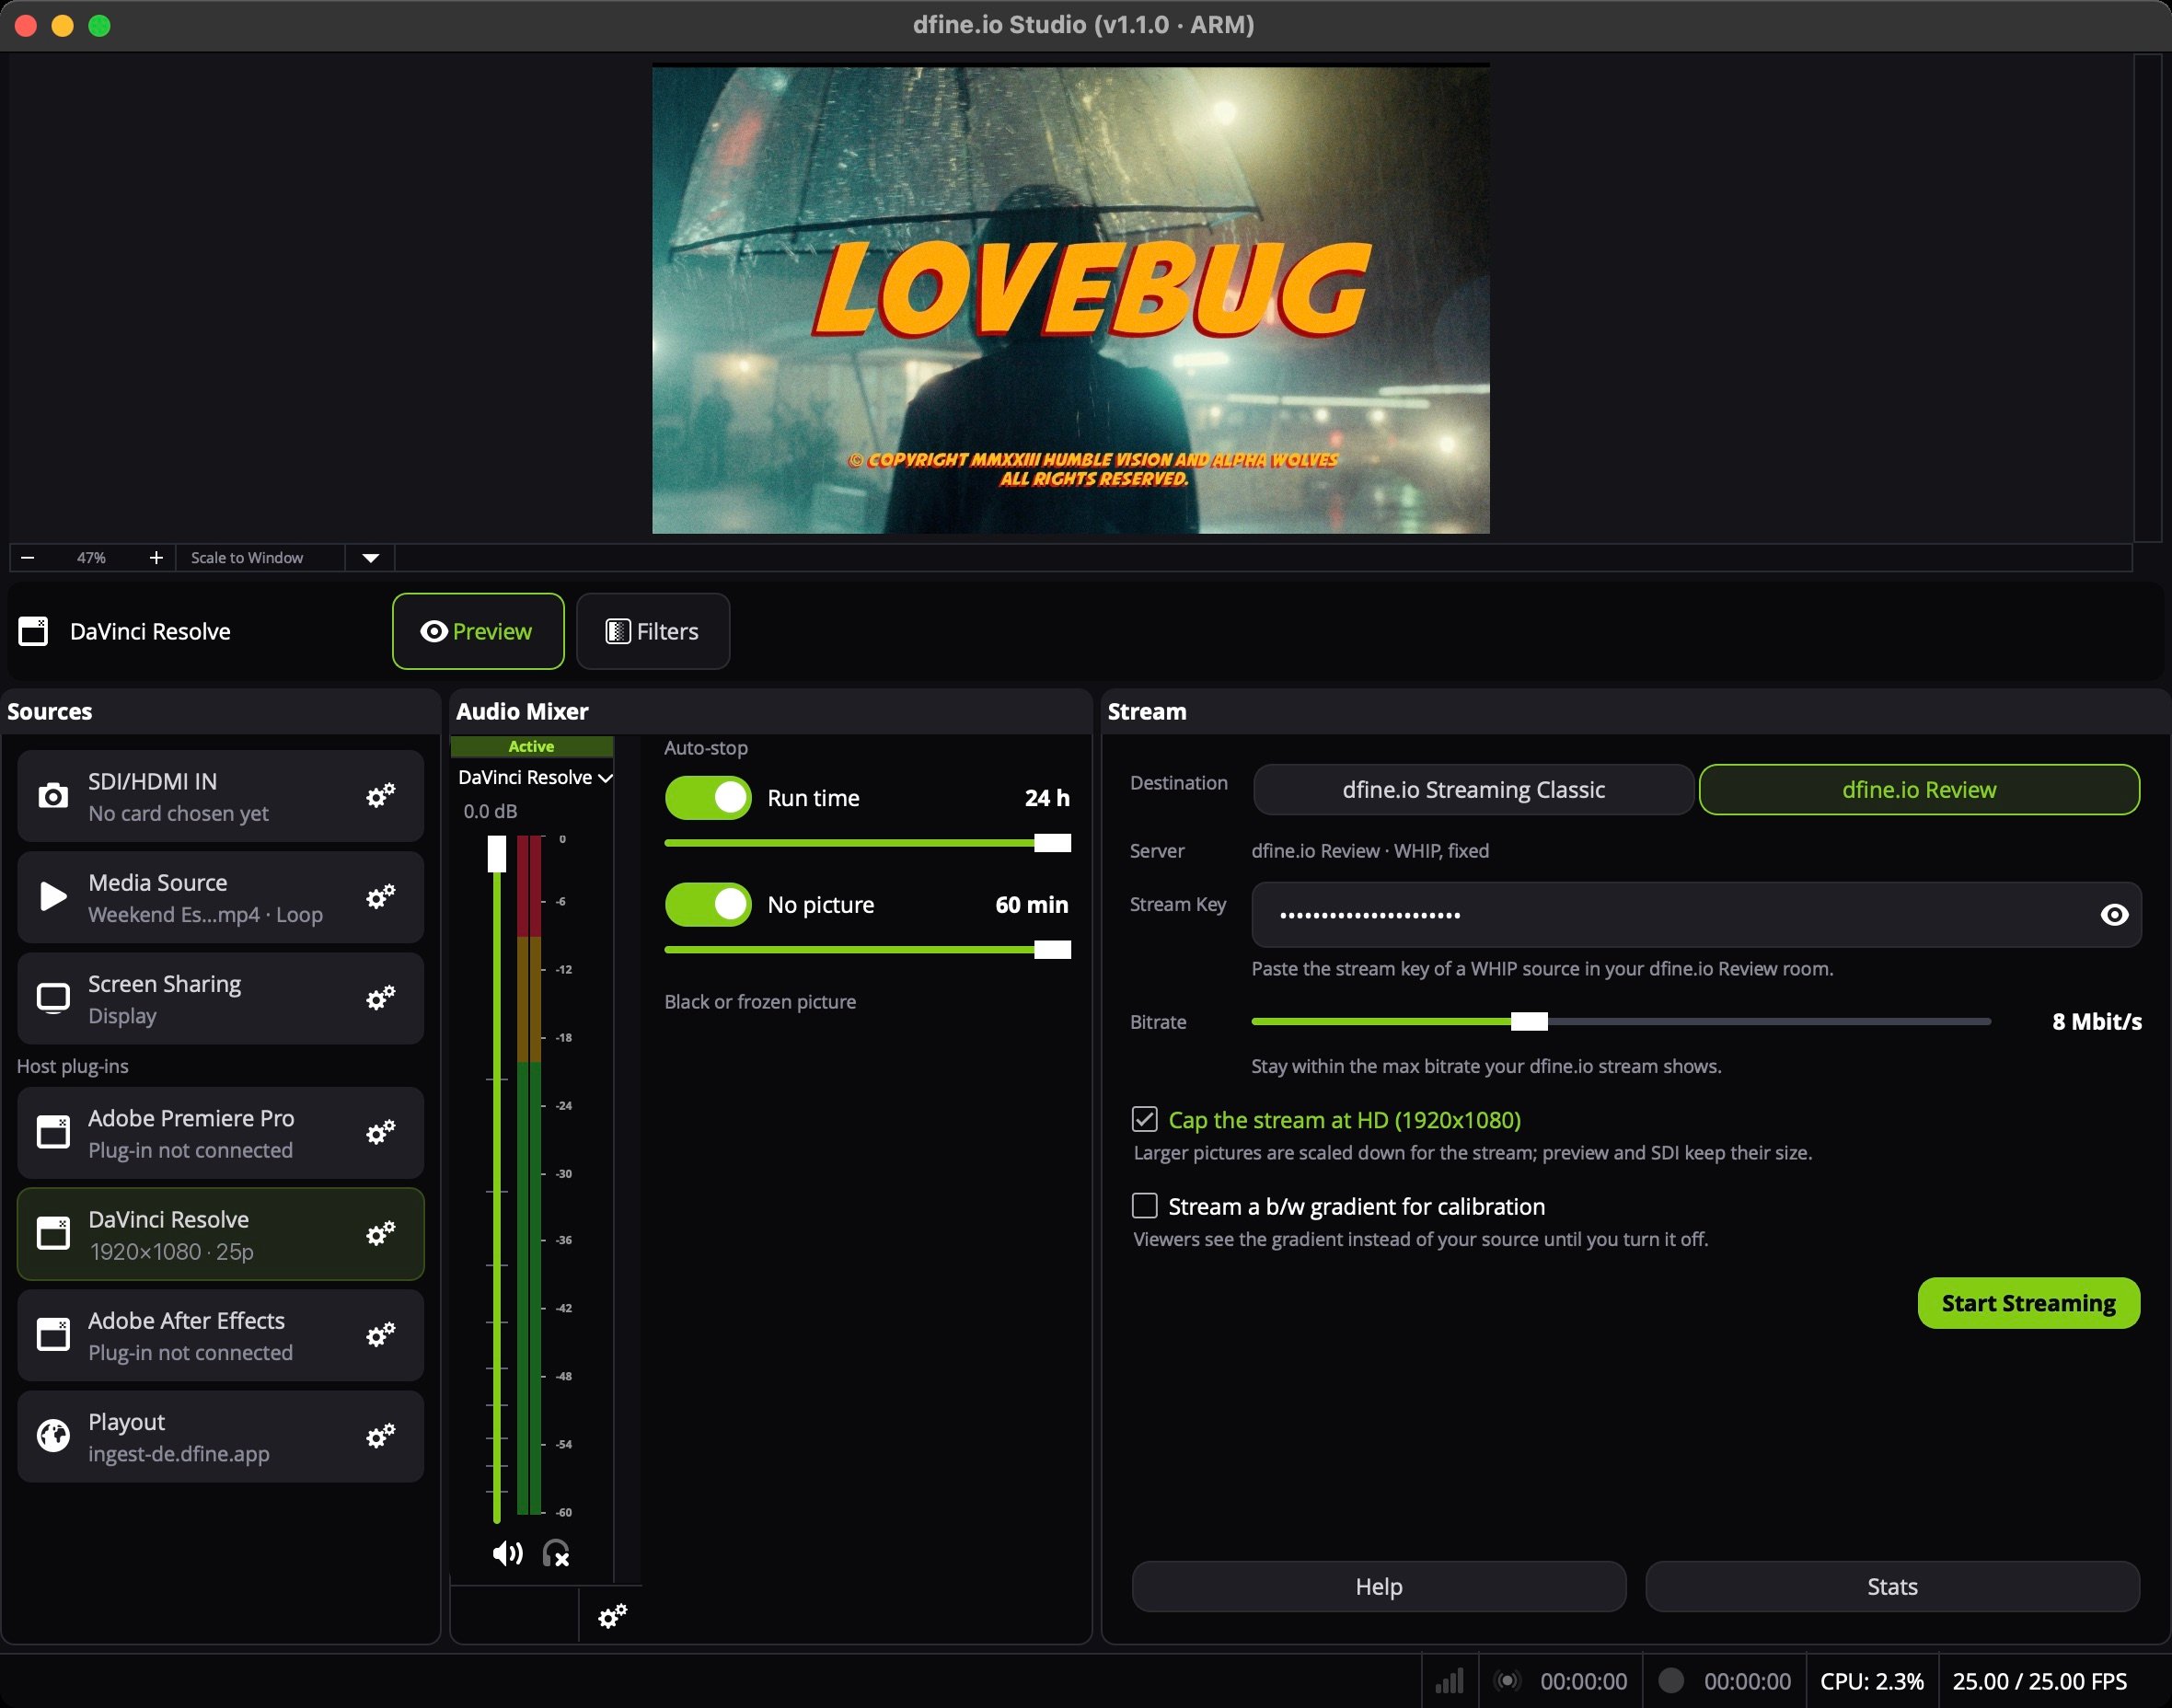
The free version of DaVinci Resolve does not load OpenFX plug-ins from other vendors.
1. Install the plug-in
In Studio’s Sources panel, click the gear on DaVinci Resolve and then Install plug-in. macOS asks for your administrator password, because OpenFX plug-ins live in a folder all users share. Quit Resolve and start it again. If Resolve is missing, the gear reads DaVinci Resolve is not in Applications.2. Add the effect to the timeline node
1
Open the Color page
Switch to the Color page and open the Library panel, where the OpenFX effects live.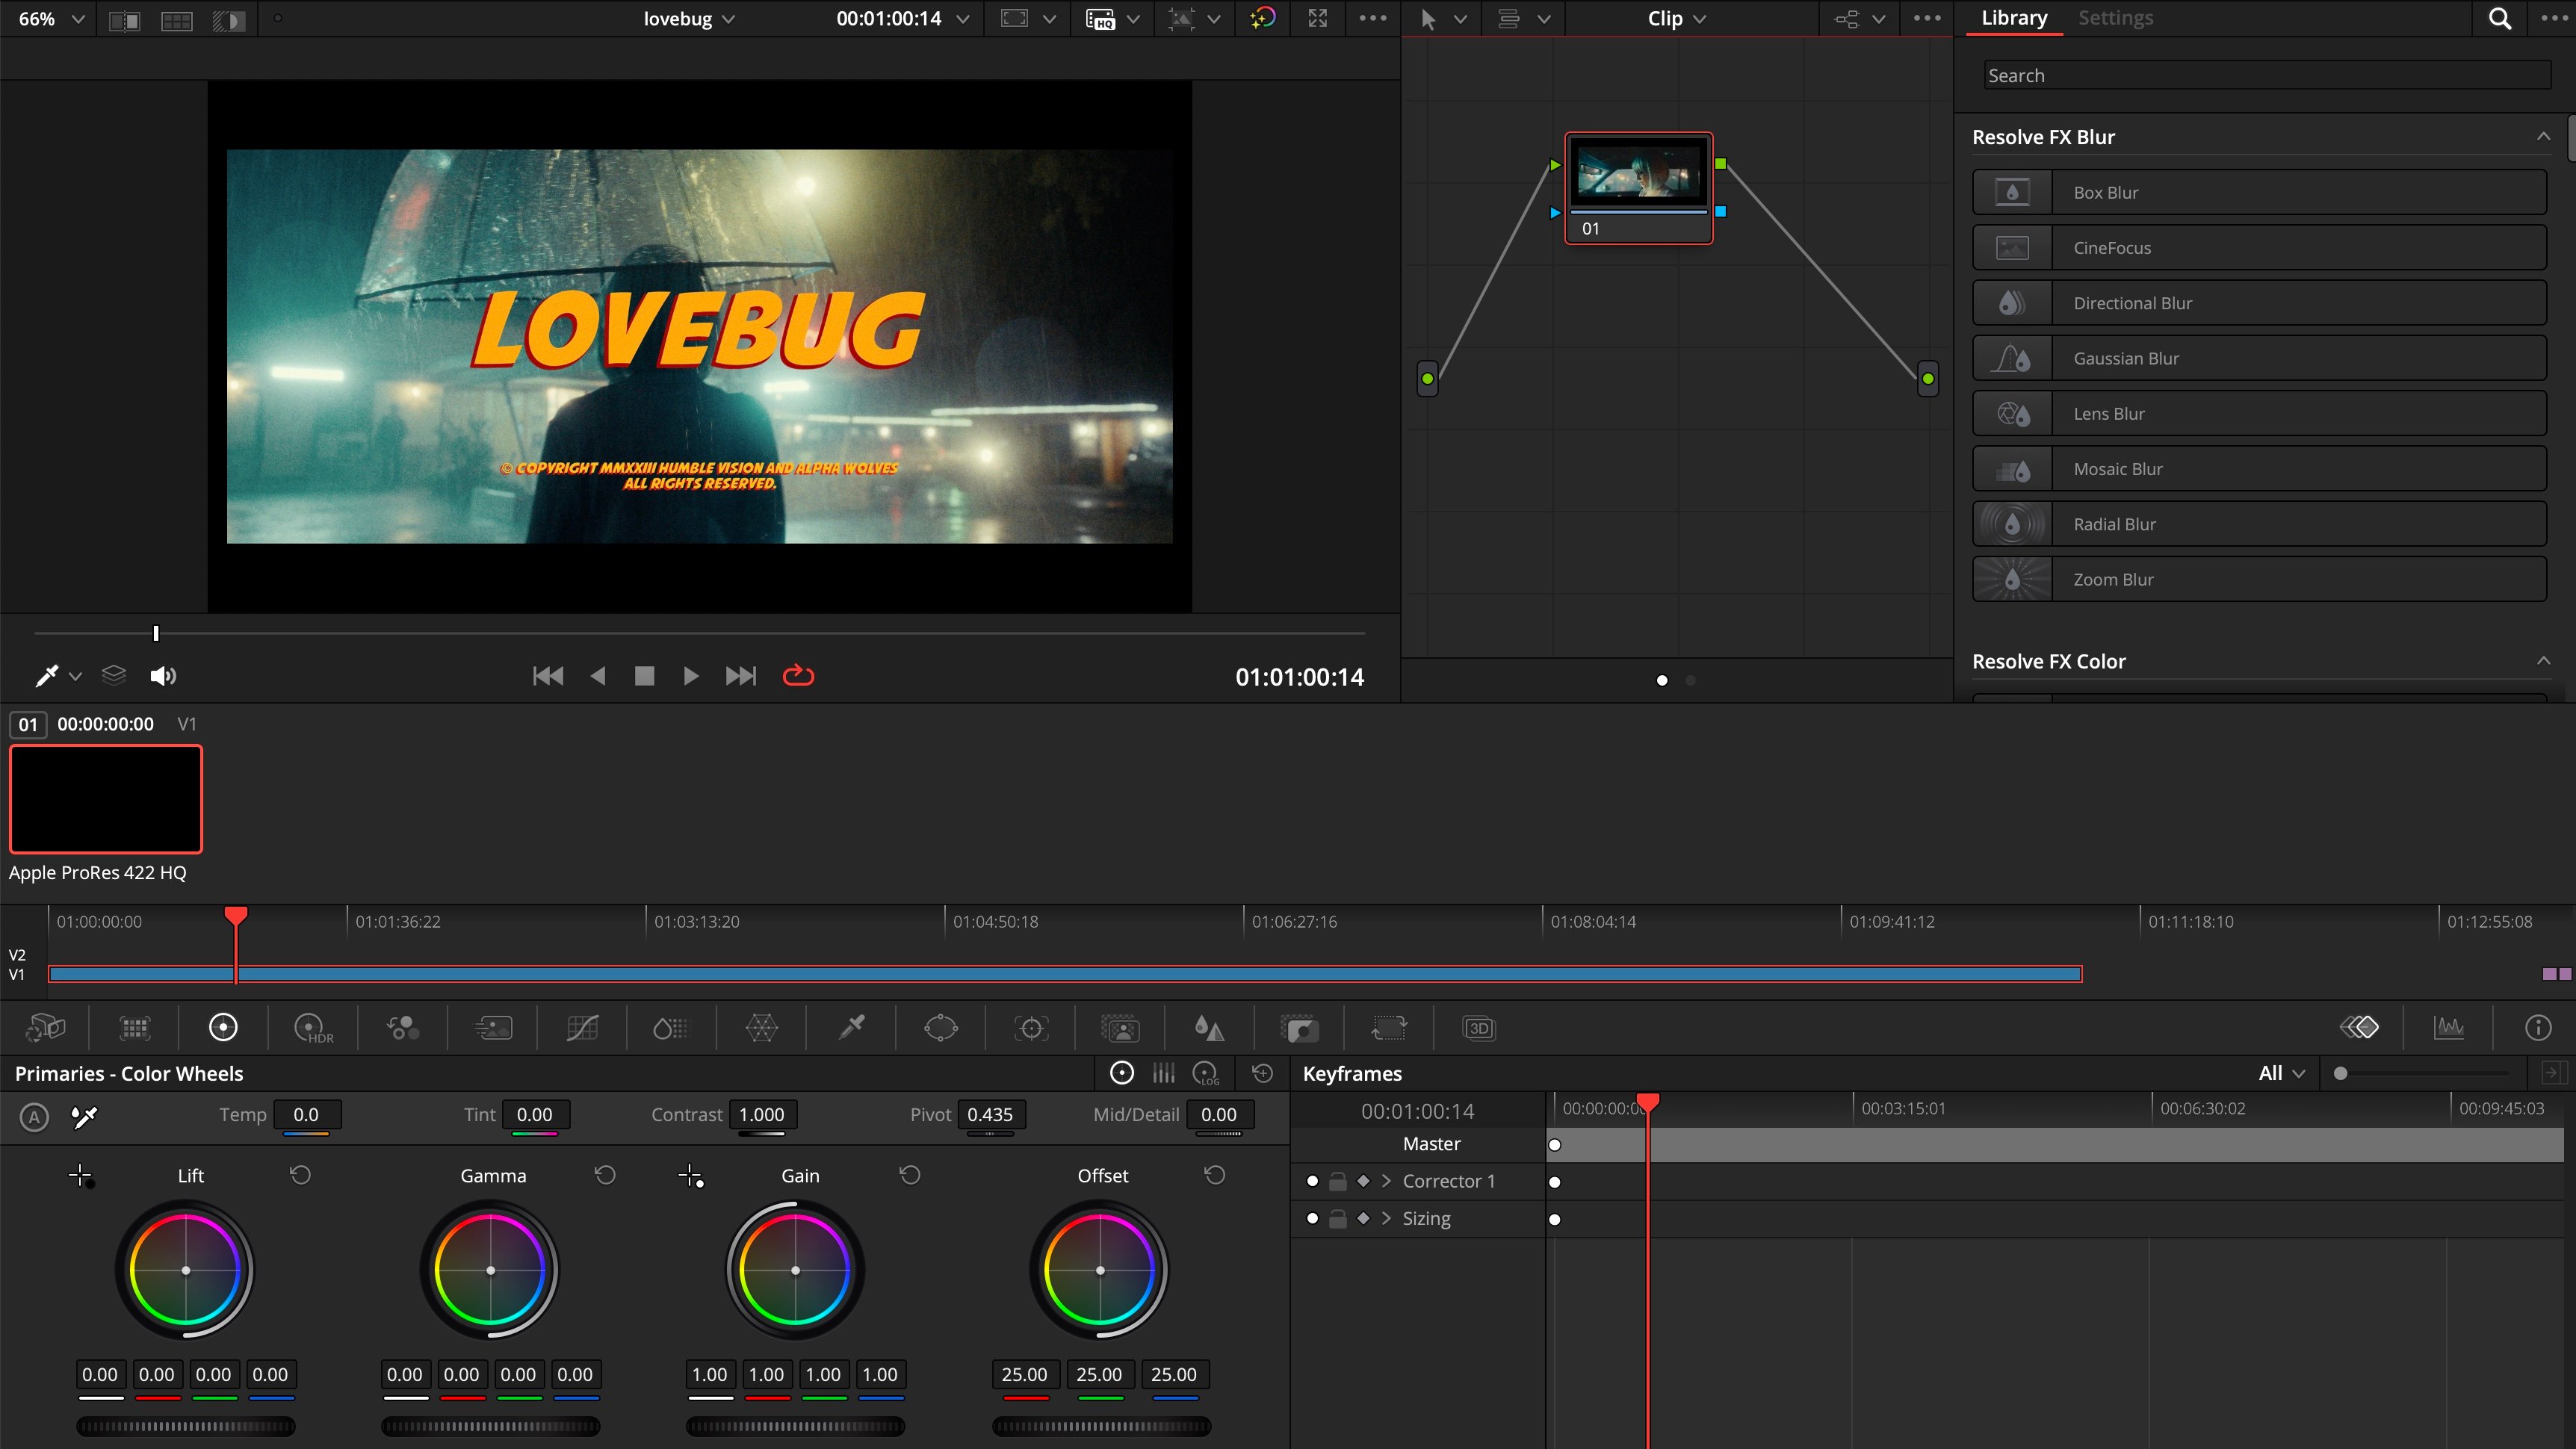
2
Switch the node graph to Timeline
Above the node graph, change Clip to Timeline. Type 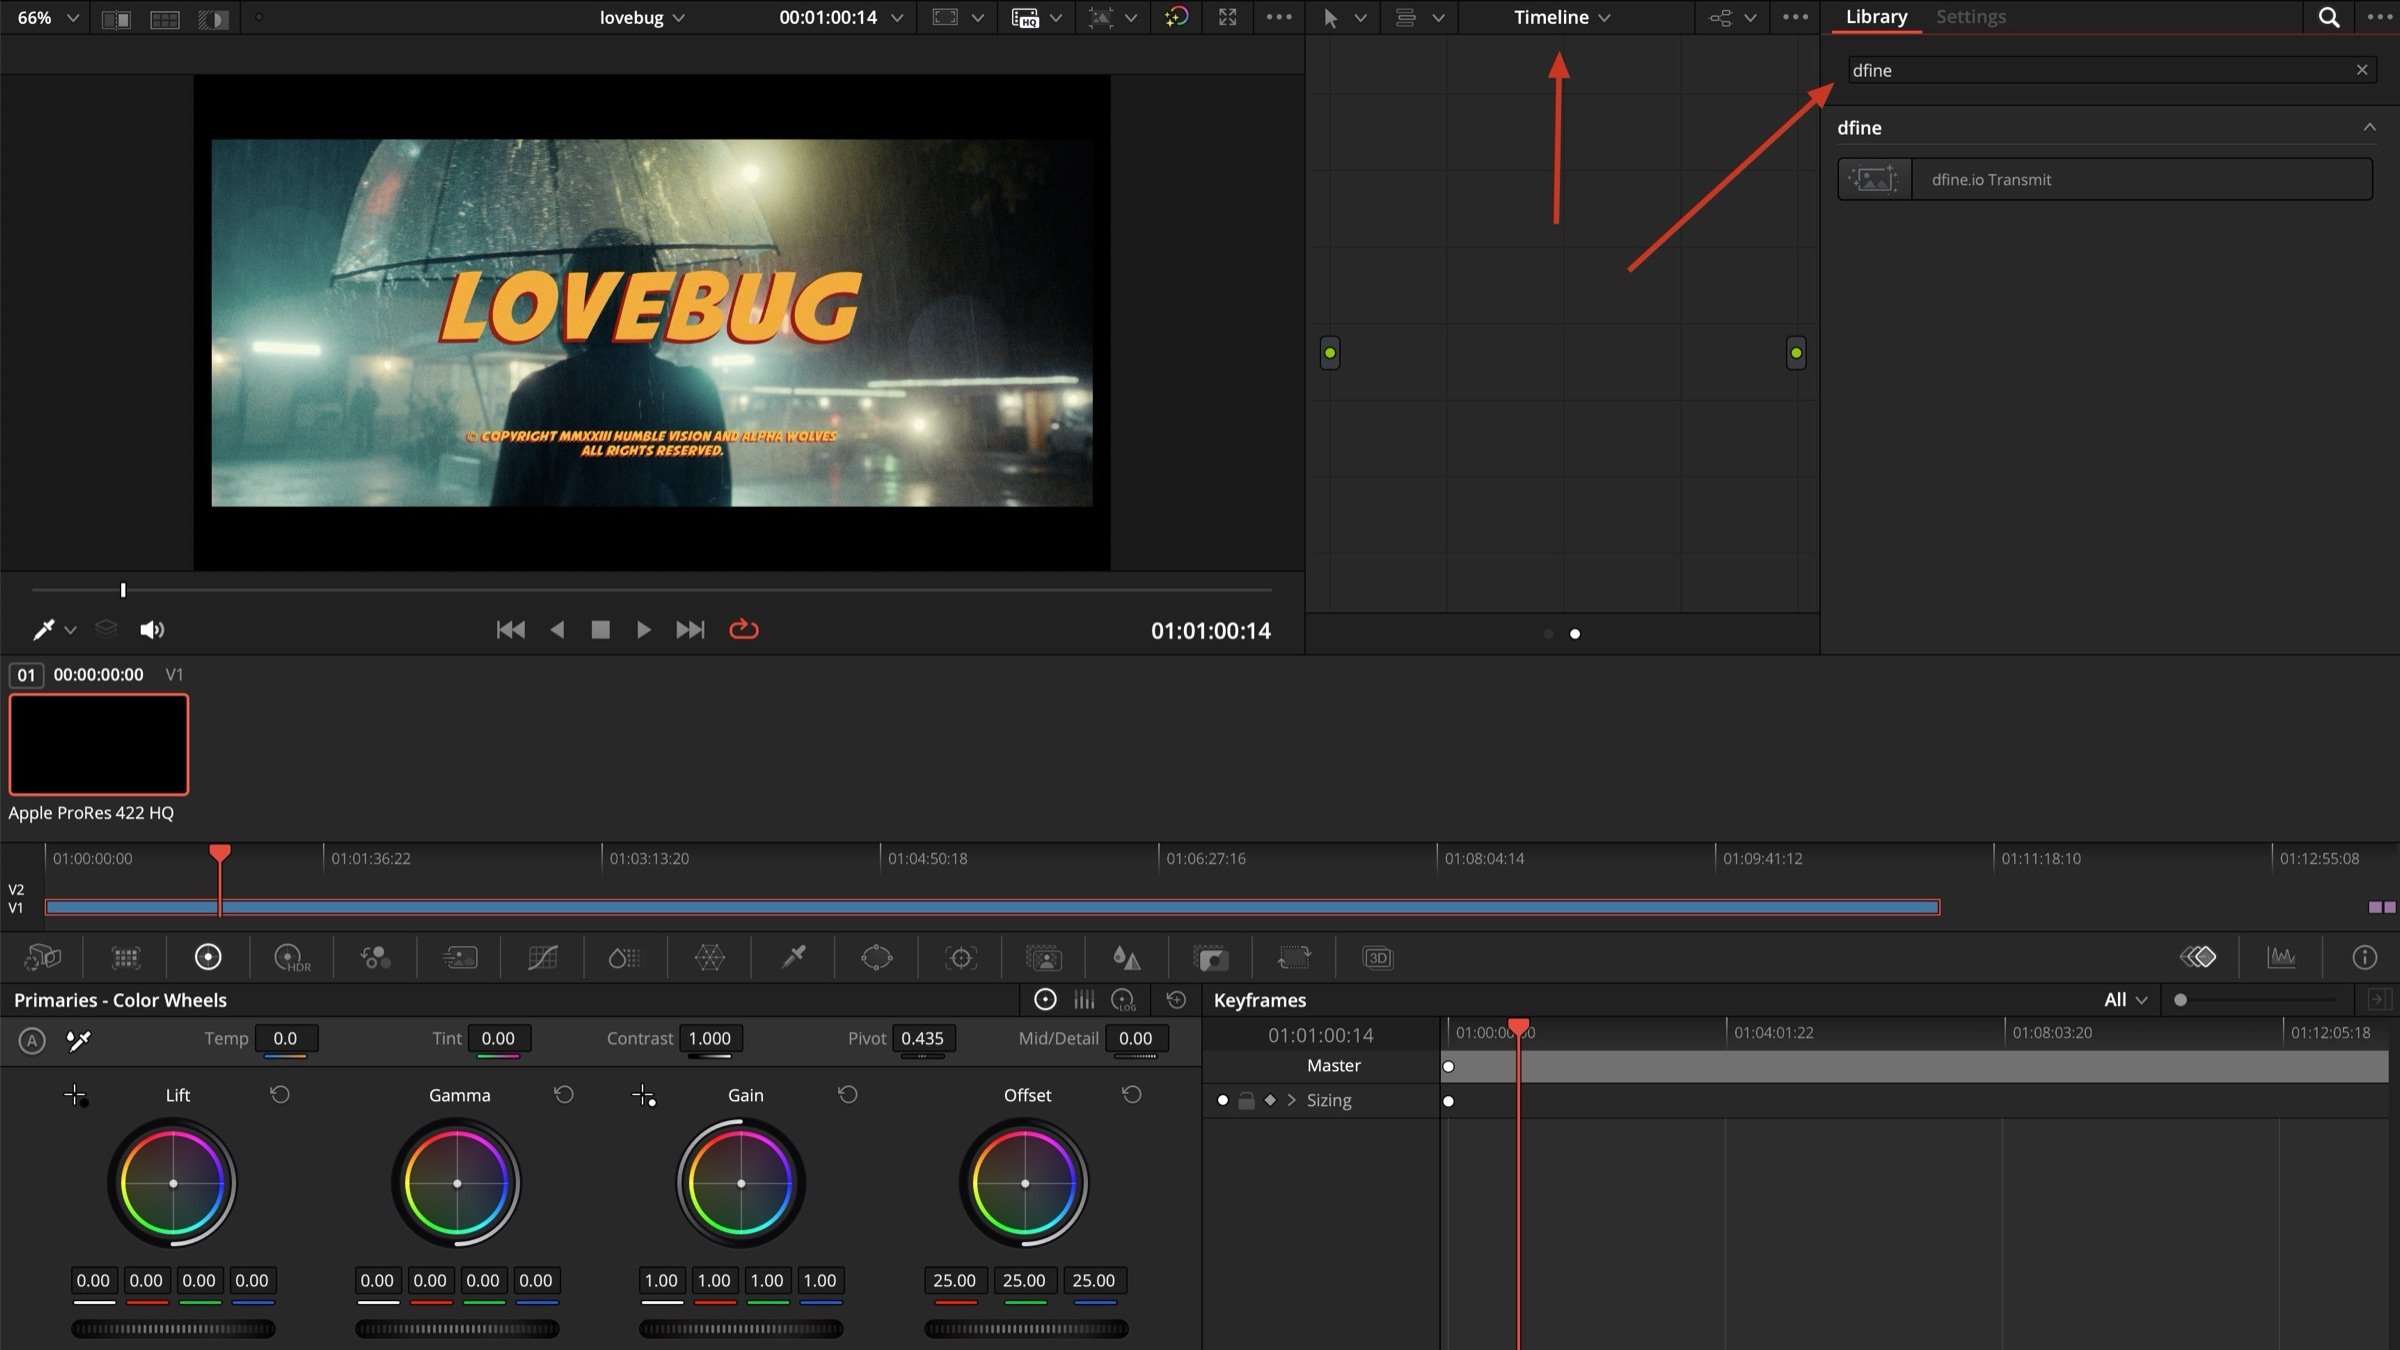
dfine into the library search. dfine.io Transmit appears.3
Drag it into the node graph
Pull dfine.io Transmit into the empty node graph.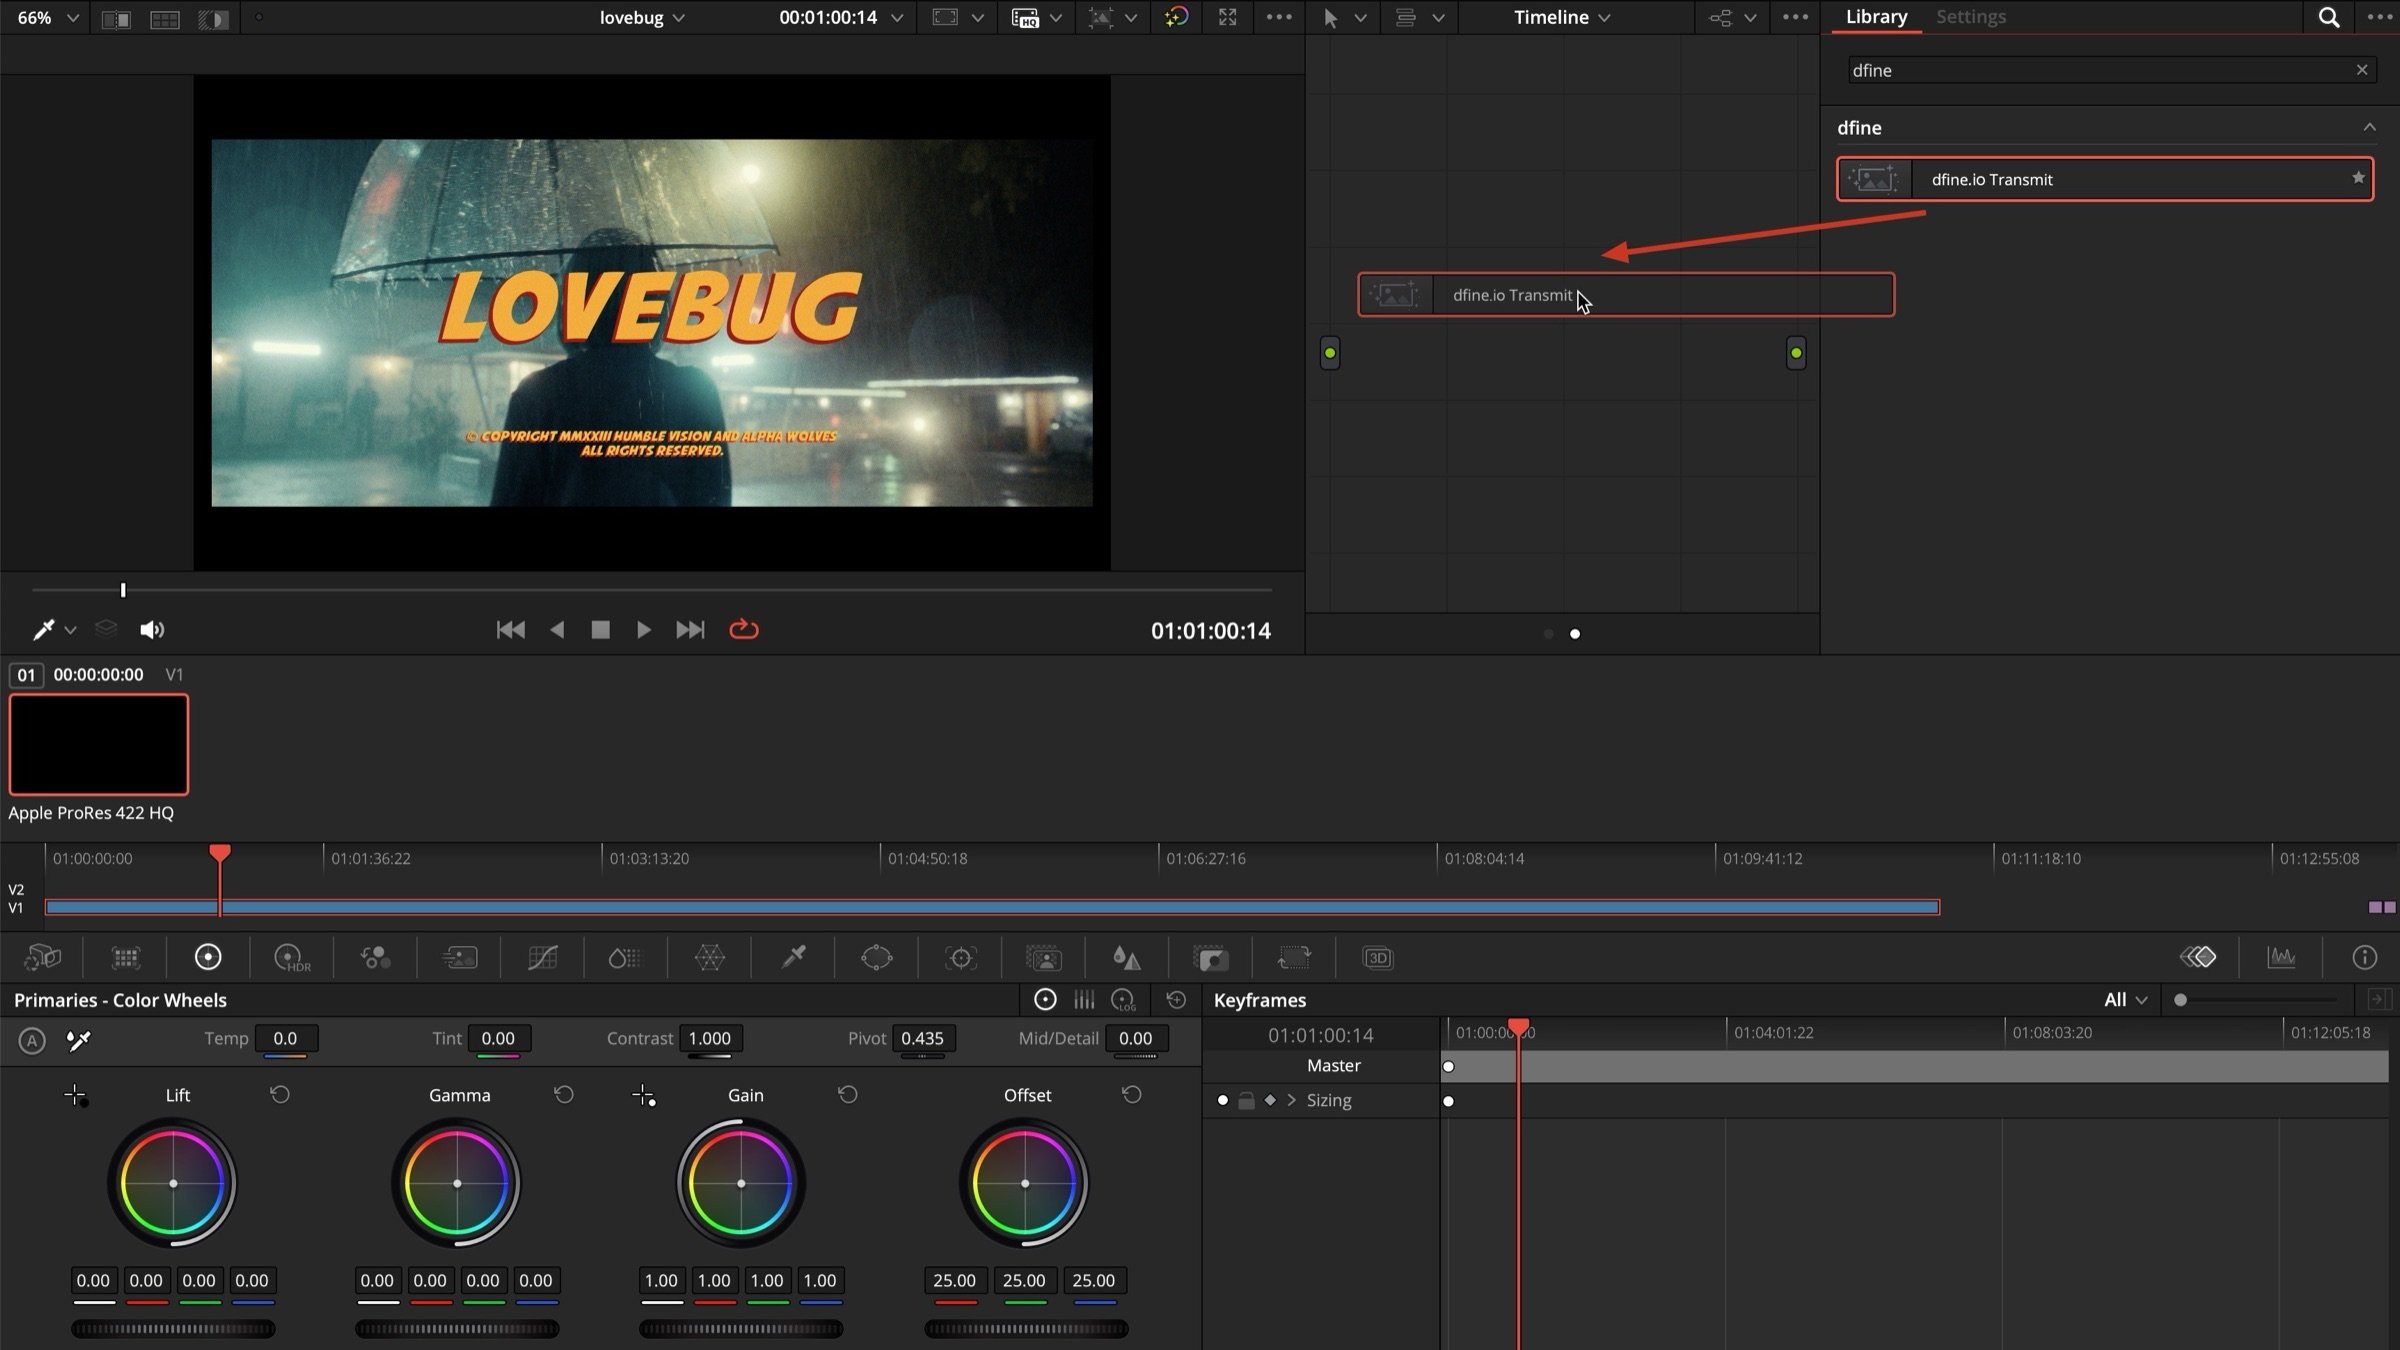
4
Switch on Transmit Audio
Select the node and tick Transmit Audio in its settings. It is off by default.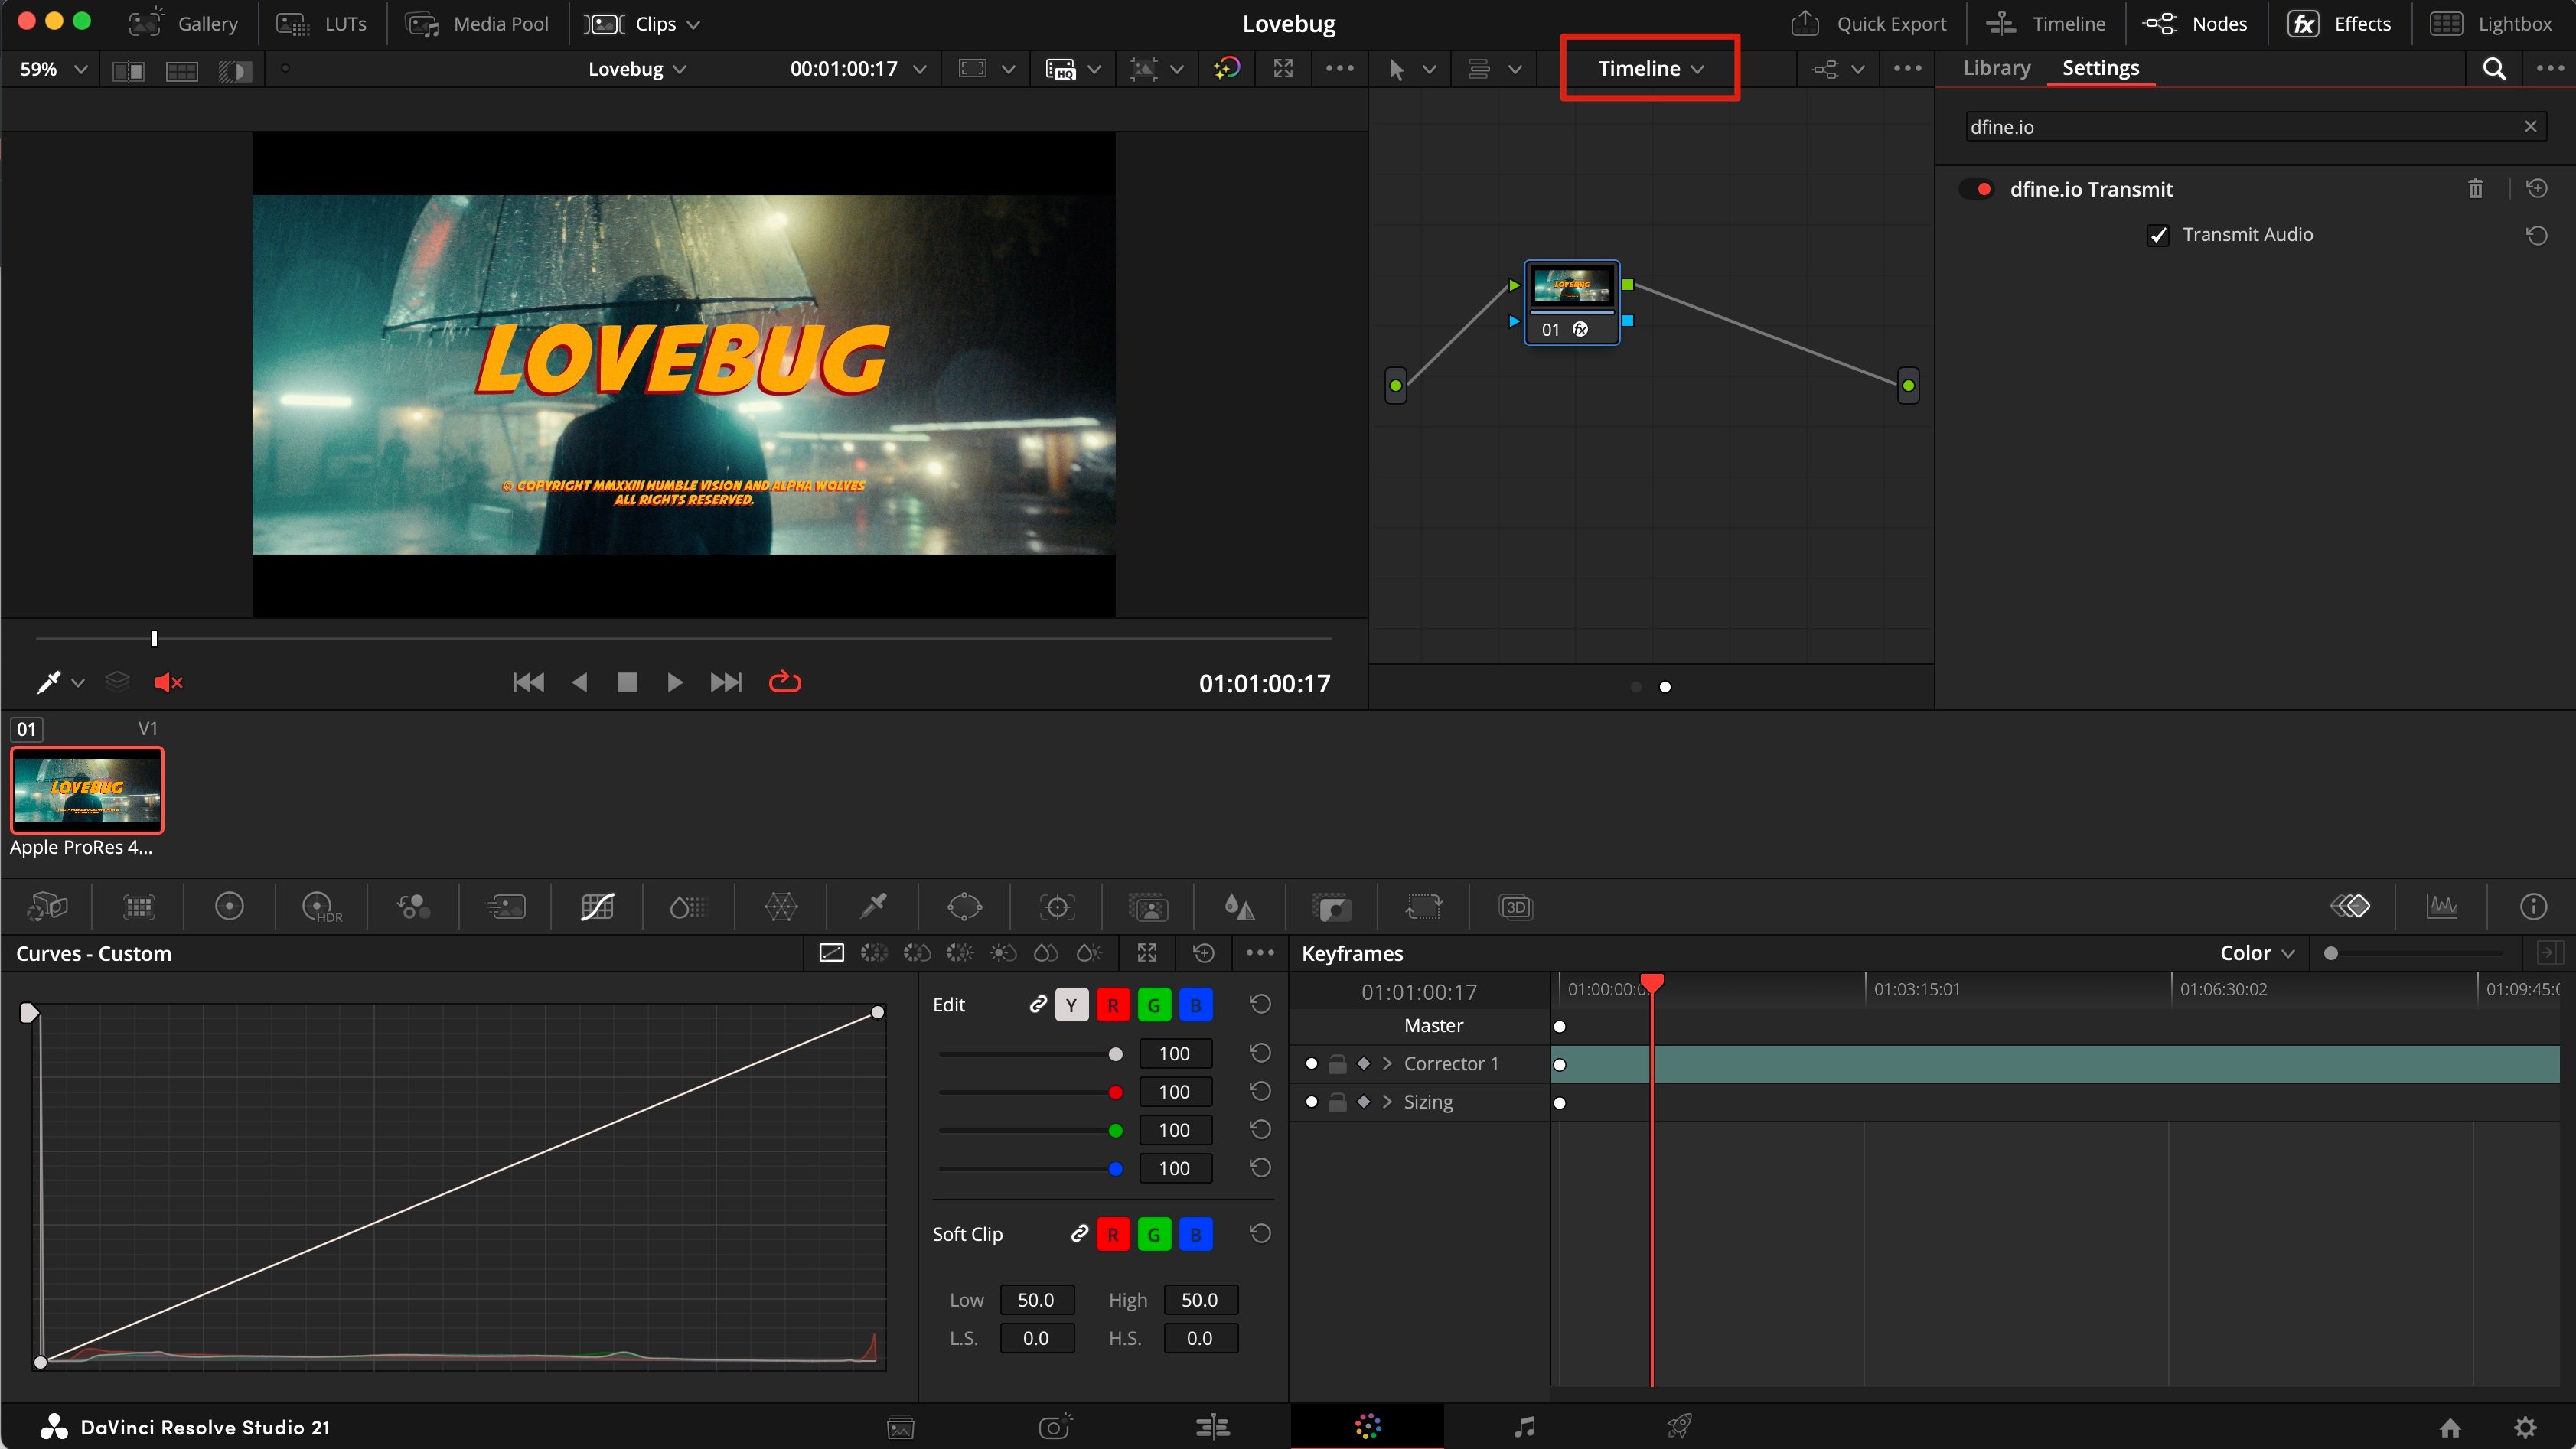
3. Pick where it goes
- dfine.io Review
- dfine.io Streaming Classic
In Review, open the room and create a source with the type WHIP, or use Quick Create. Click Copy Stream Key.In Studio’s Stream panel, set Destination to dfine.io Review. Server reads dfine.io Review · WHIP, fixed. Paste the key into Stream Key.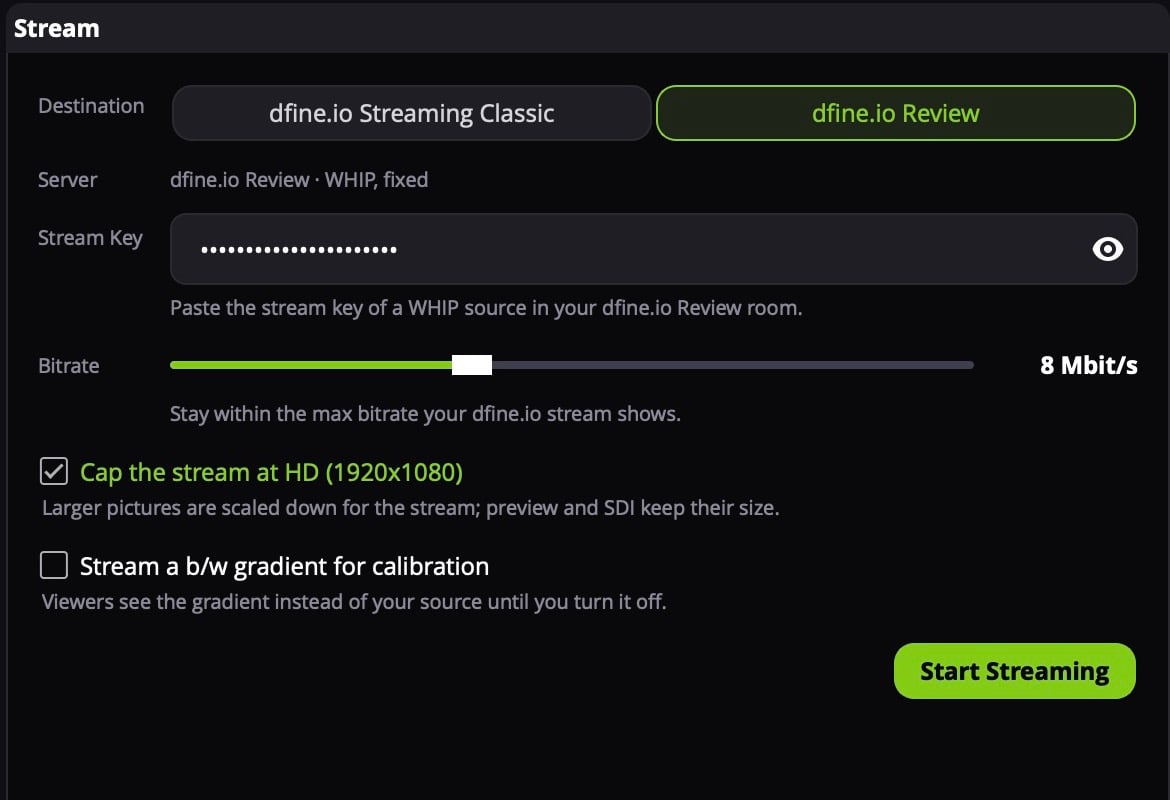
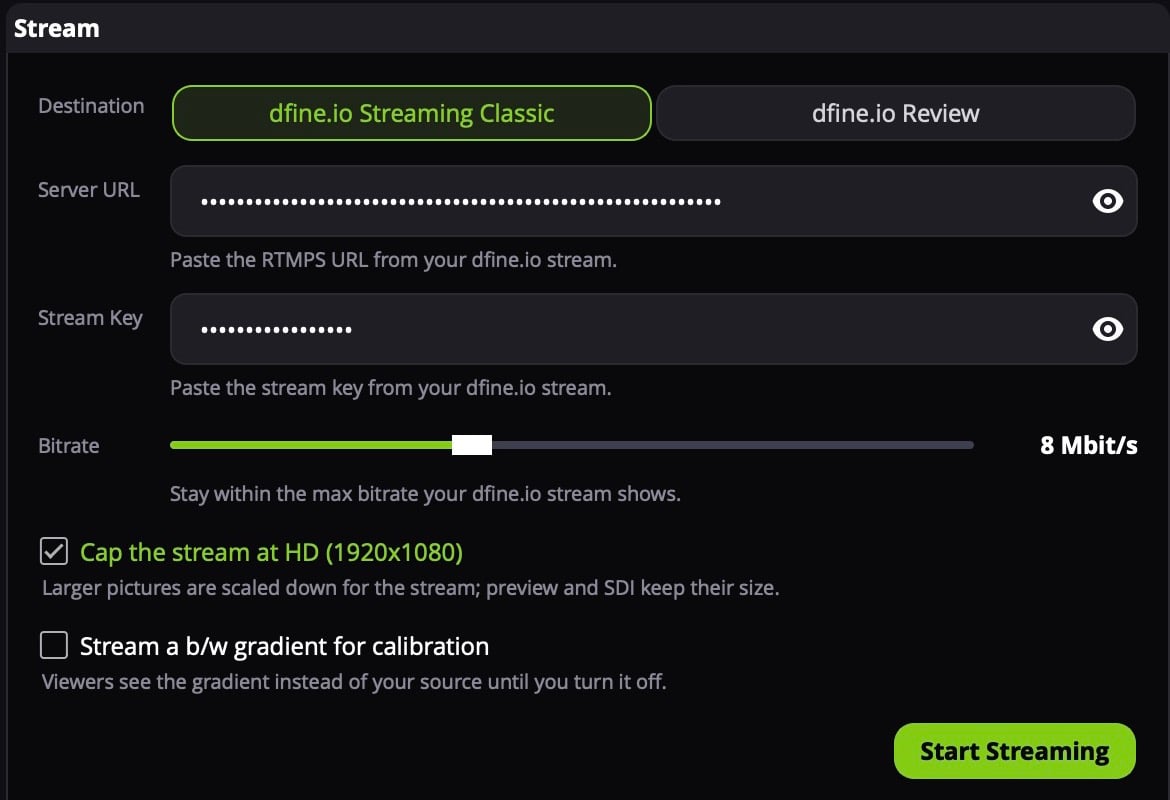
4. Start
Play the timeline. In Studio the DaVinci Resolve row shows size and frame rate. Click it to put it on air, then click Start Streaming. The first time, macOS asks for Screen & System Audio Recording, which Studio needs for Resolve’s sound.