> ## Documentation Index
> Fetch the complete documentation index at: https://docs.dfine.app/llms.txt
> Use this file to discover all available pages before exploring further.
# GUI screen sharing with OBS
> Share one application's interface cleanly with OBS — a focused screen-sharing scene for editing tools, grading, presentations and more.
This is a clean way to show a single application's interface live — your editor (Premiere, Resolve, Flame), a presentation (Keynote) or any other tool. The trick over plain screen sharing: you build a **screen-sharing scene in OBS that focuses on one application's window**, so everything else on your desktop stays hidden and your client sees only what you want them to — clearly framed, with the audio included.
These steps apply to **both** dfine.io products that livestream — Streaming Classic and Review. The encoder setup is the same; only where you copy your ingest URL and stream key differs by product. See [Where do I find the ingest server URL?](/en/where-do-i-find-the-ingest-server-url).
Get OBS ready before you build the scene.
Create a new scene called **GUI Screensharing**.
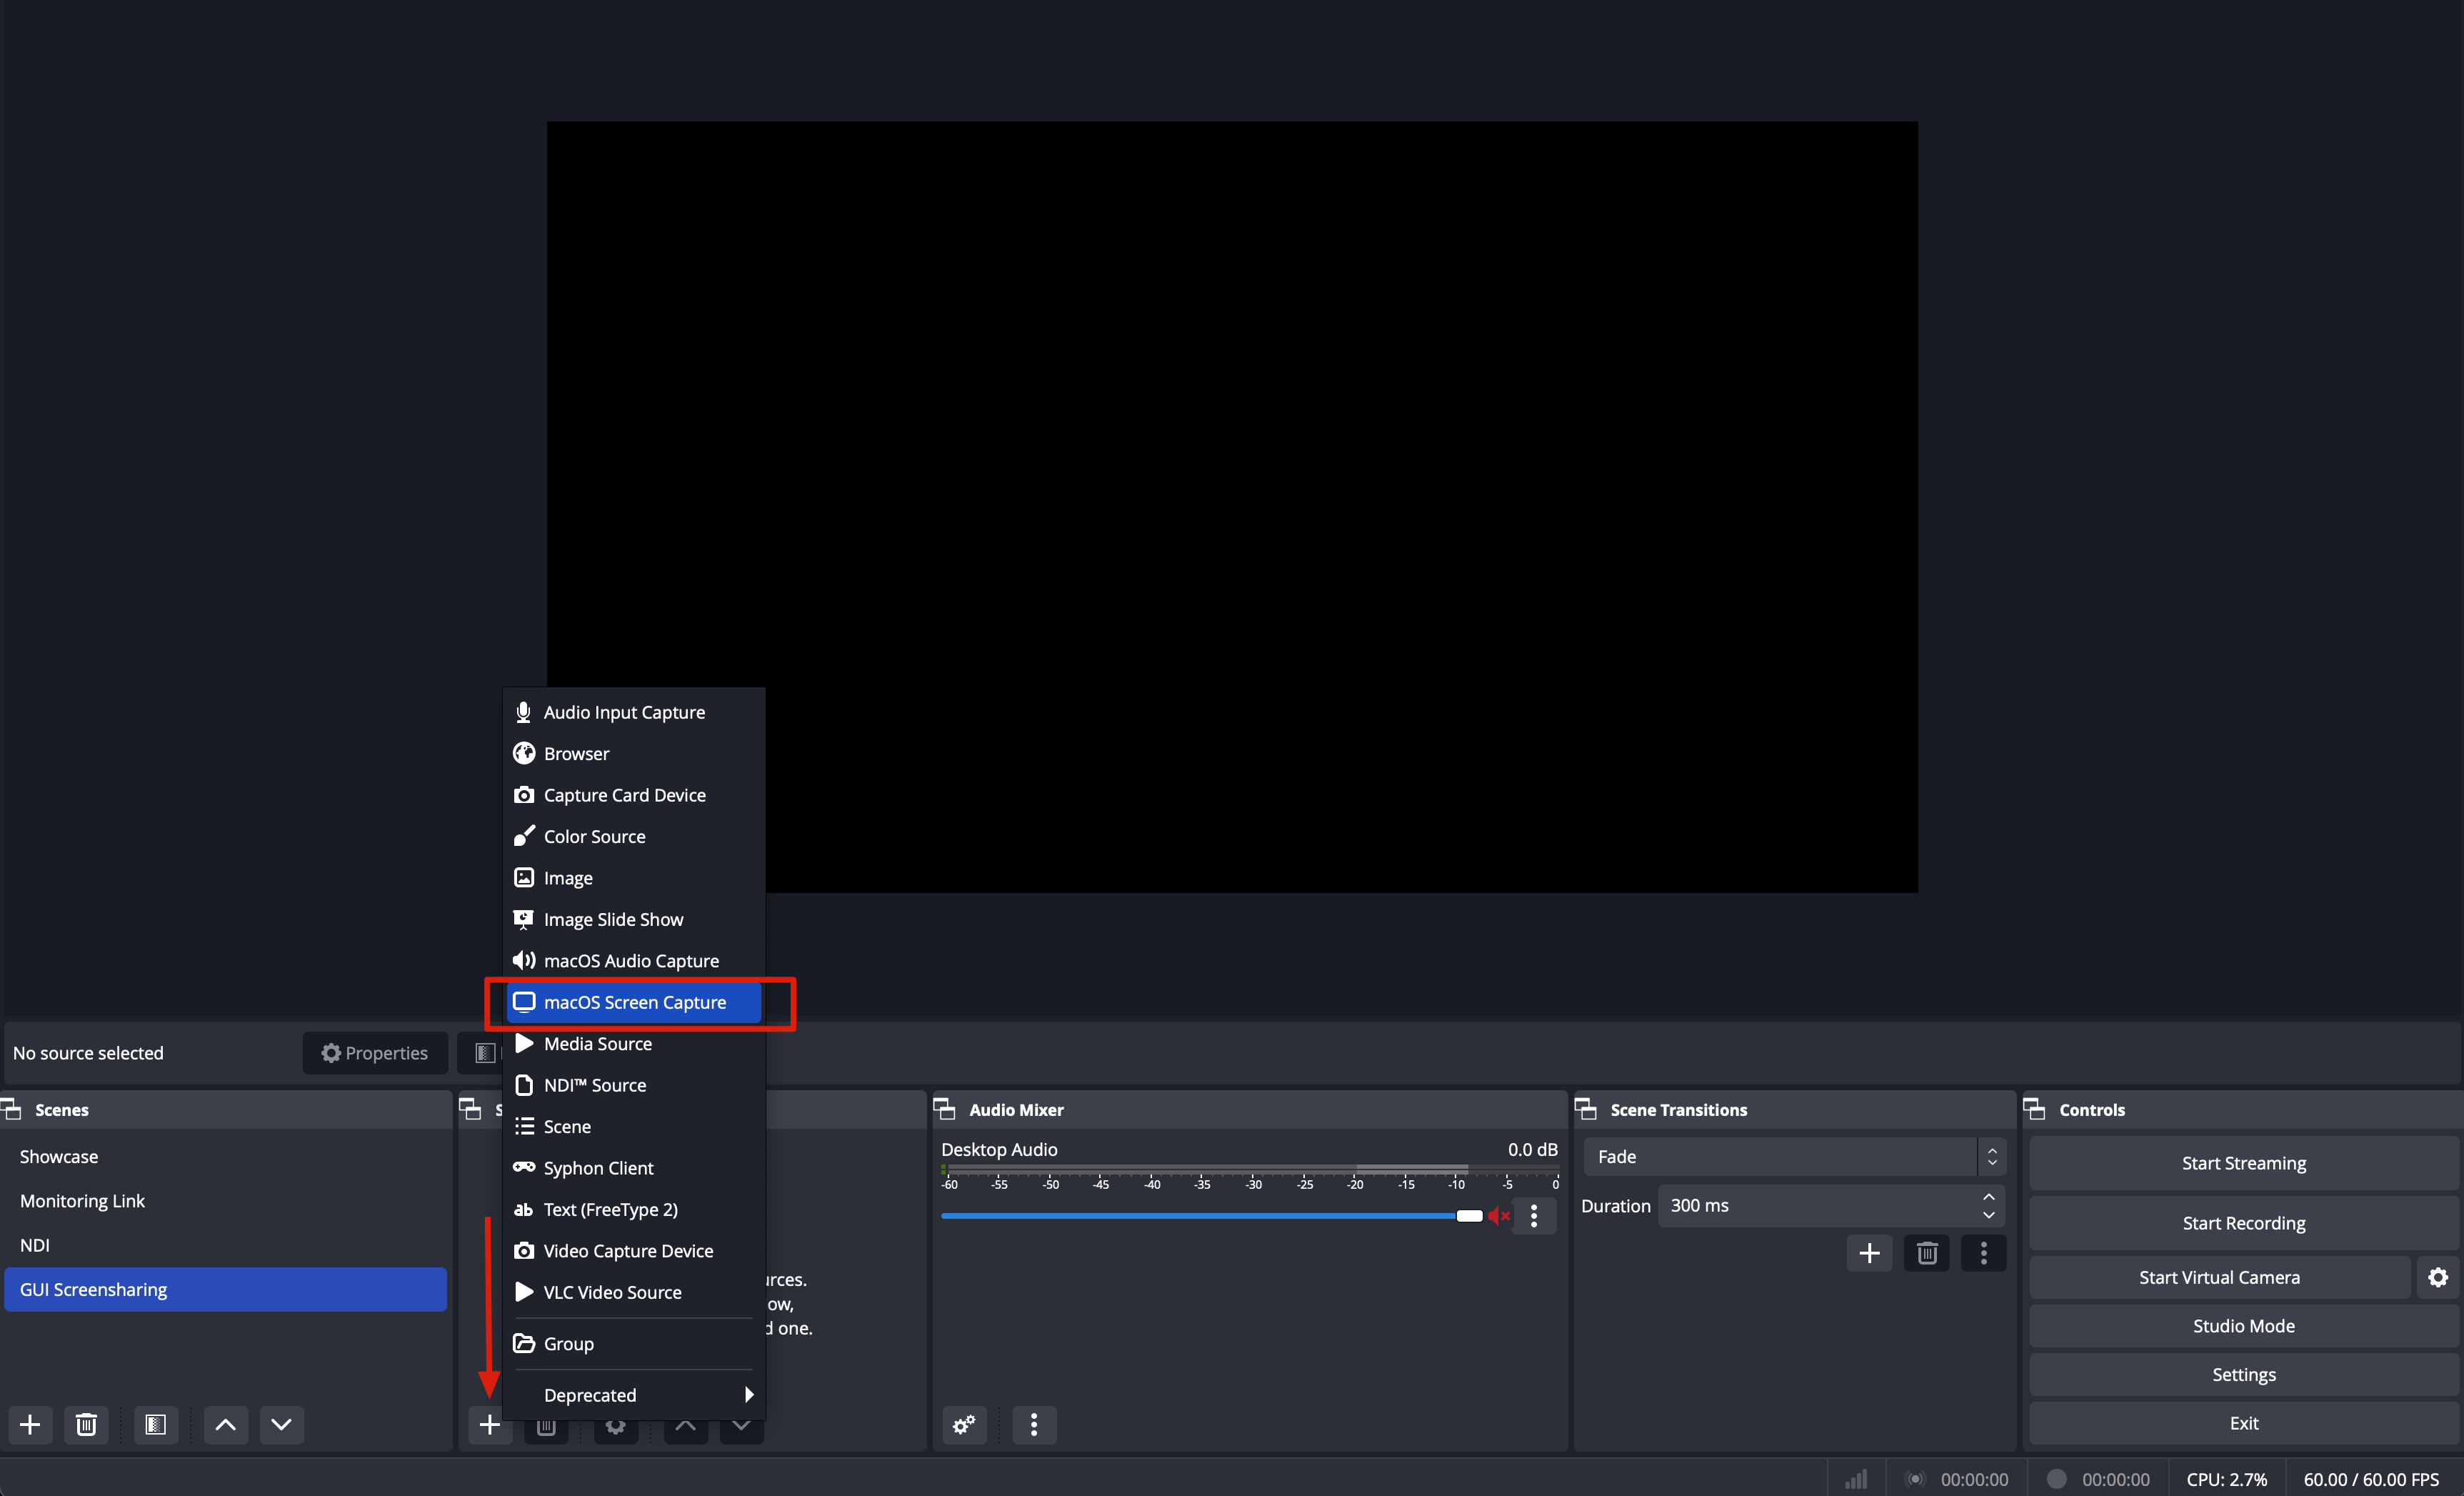
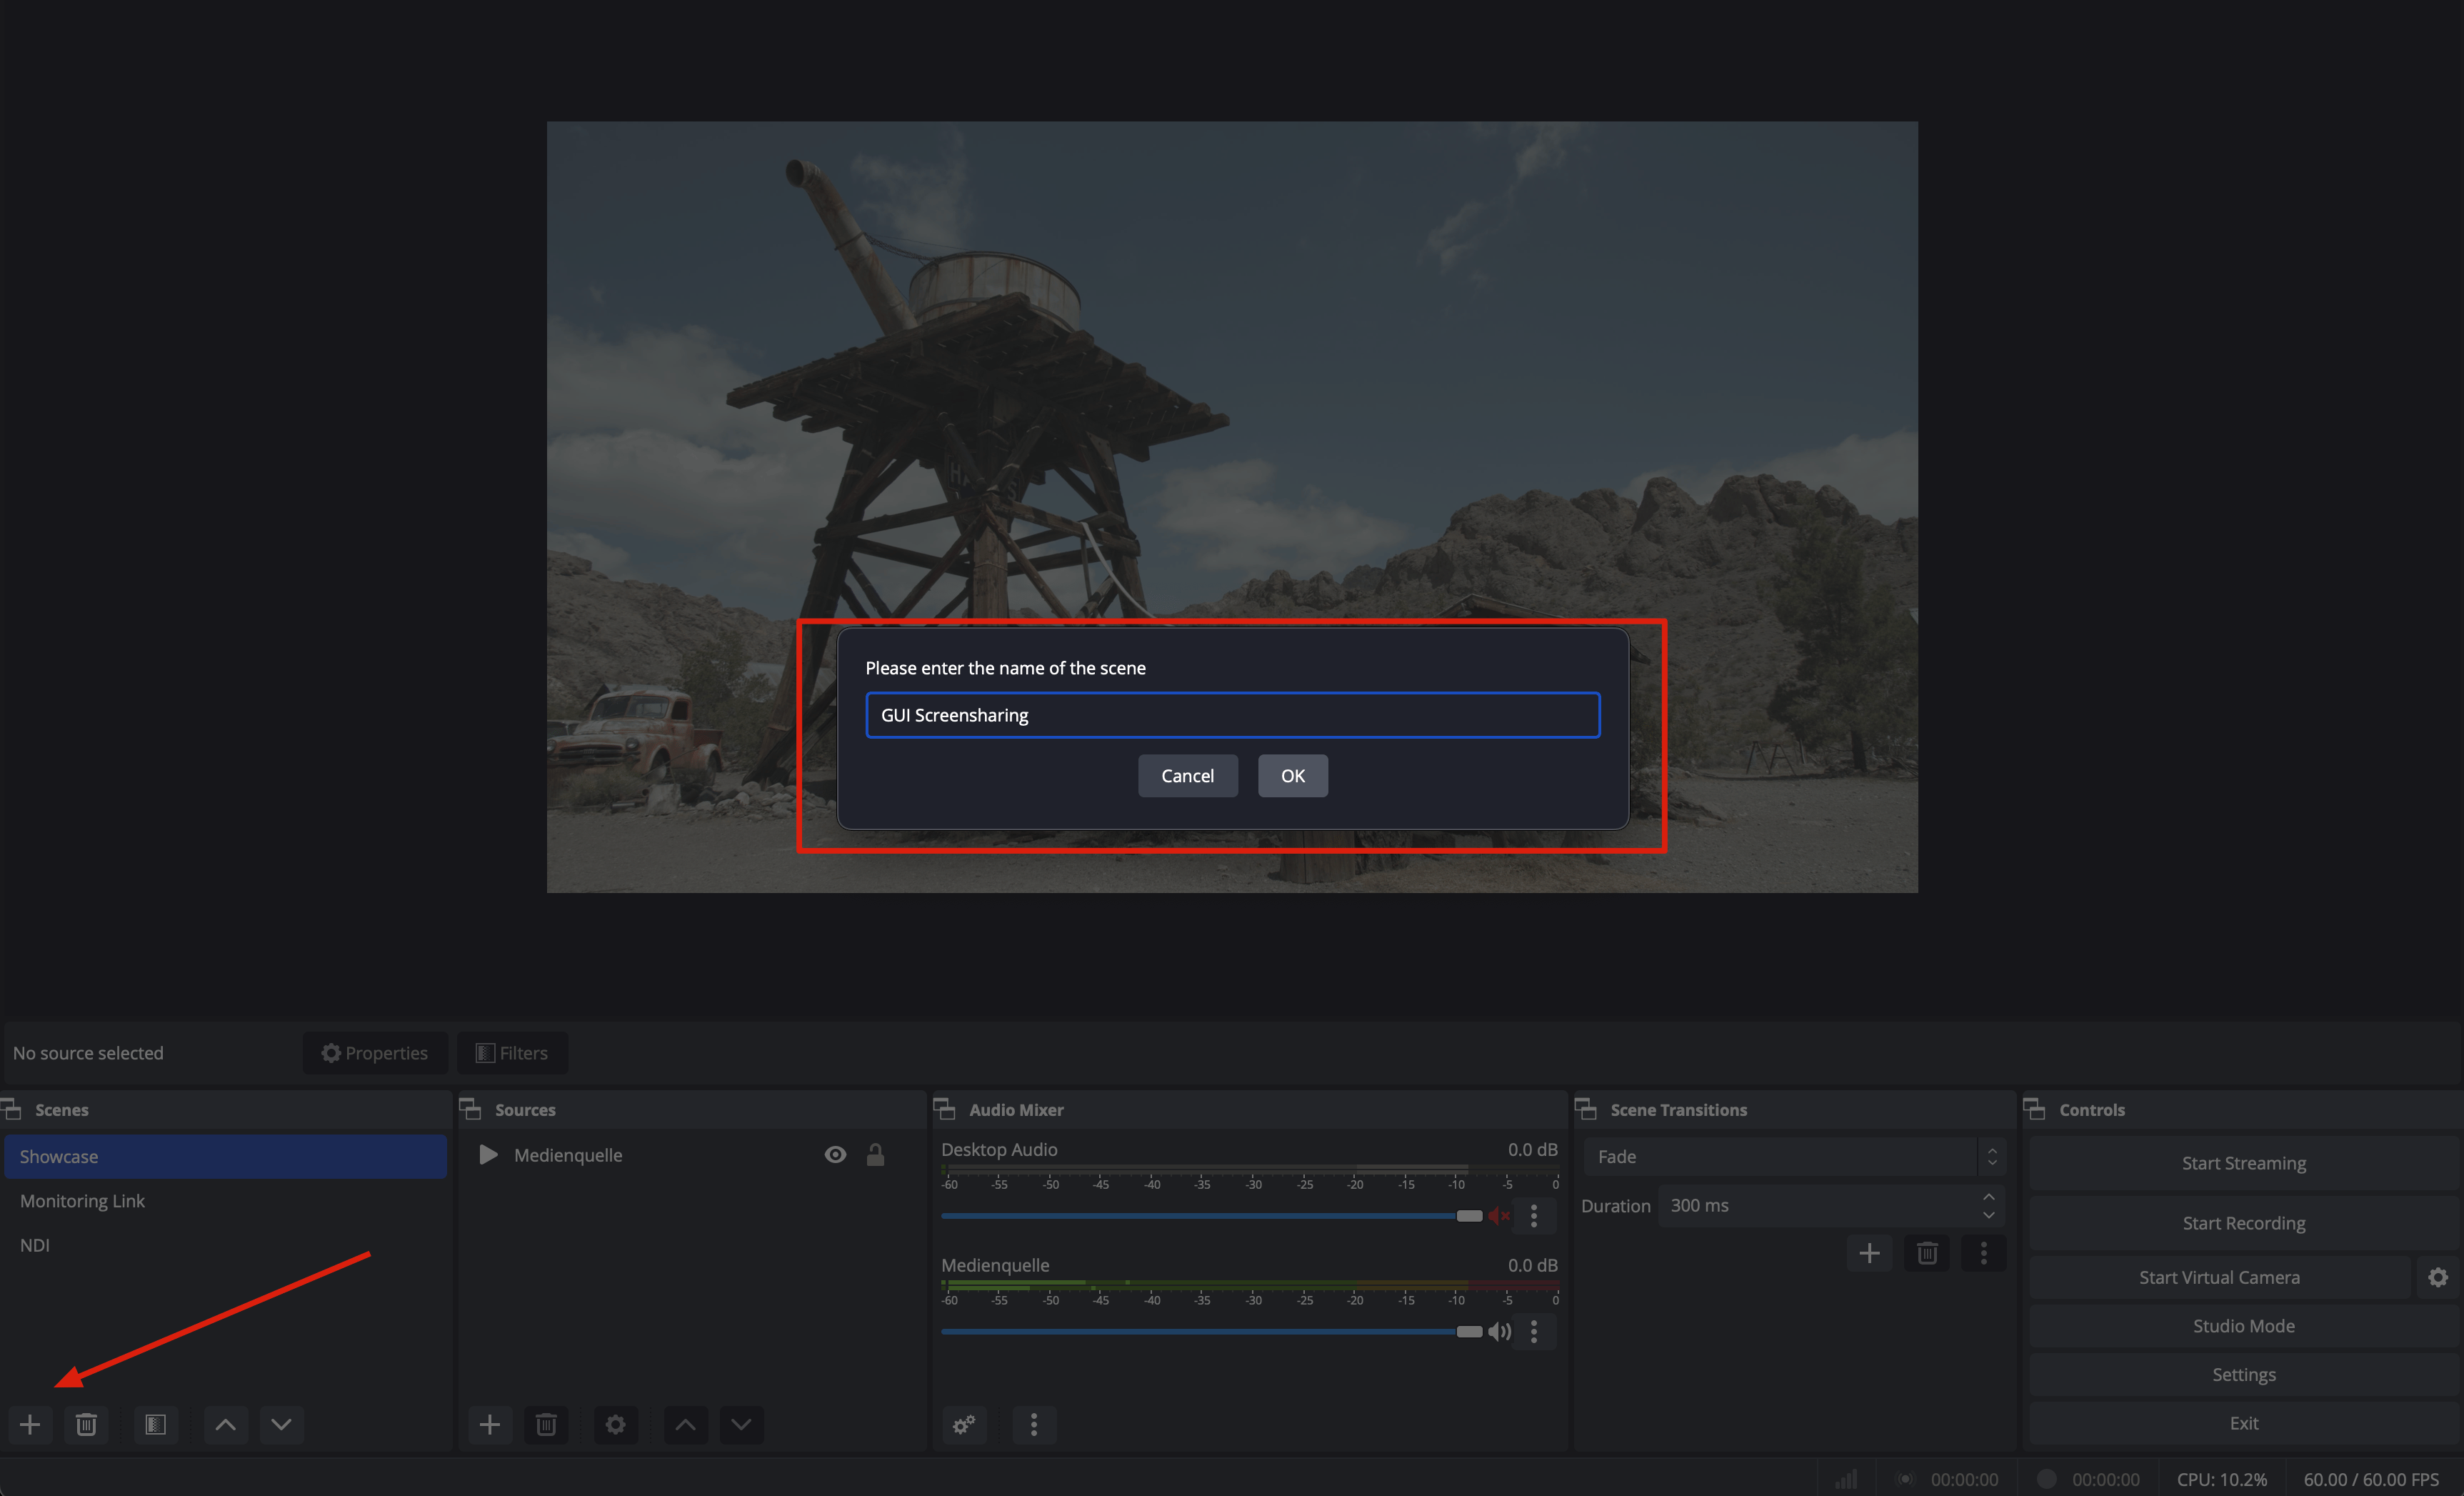 Add a **macOS Screen Capture** source and give it a name.
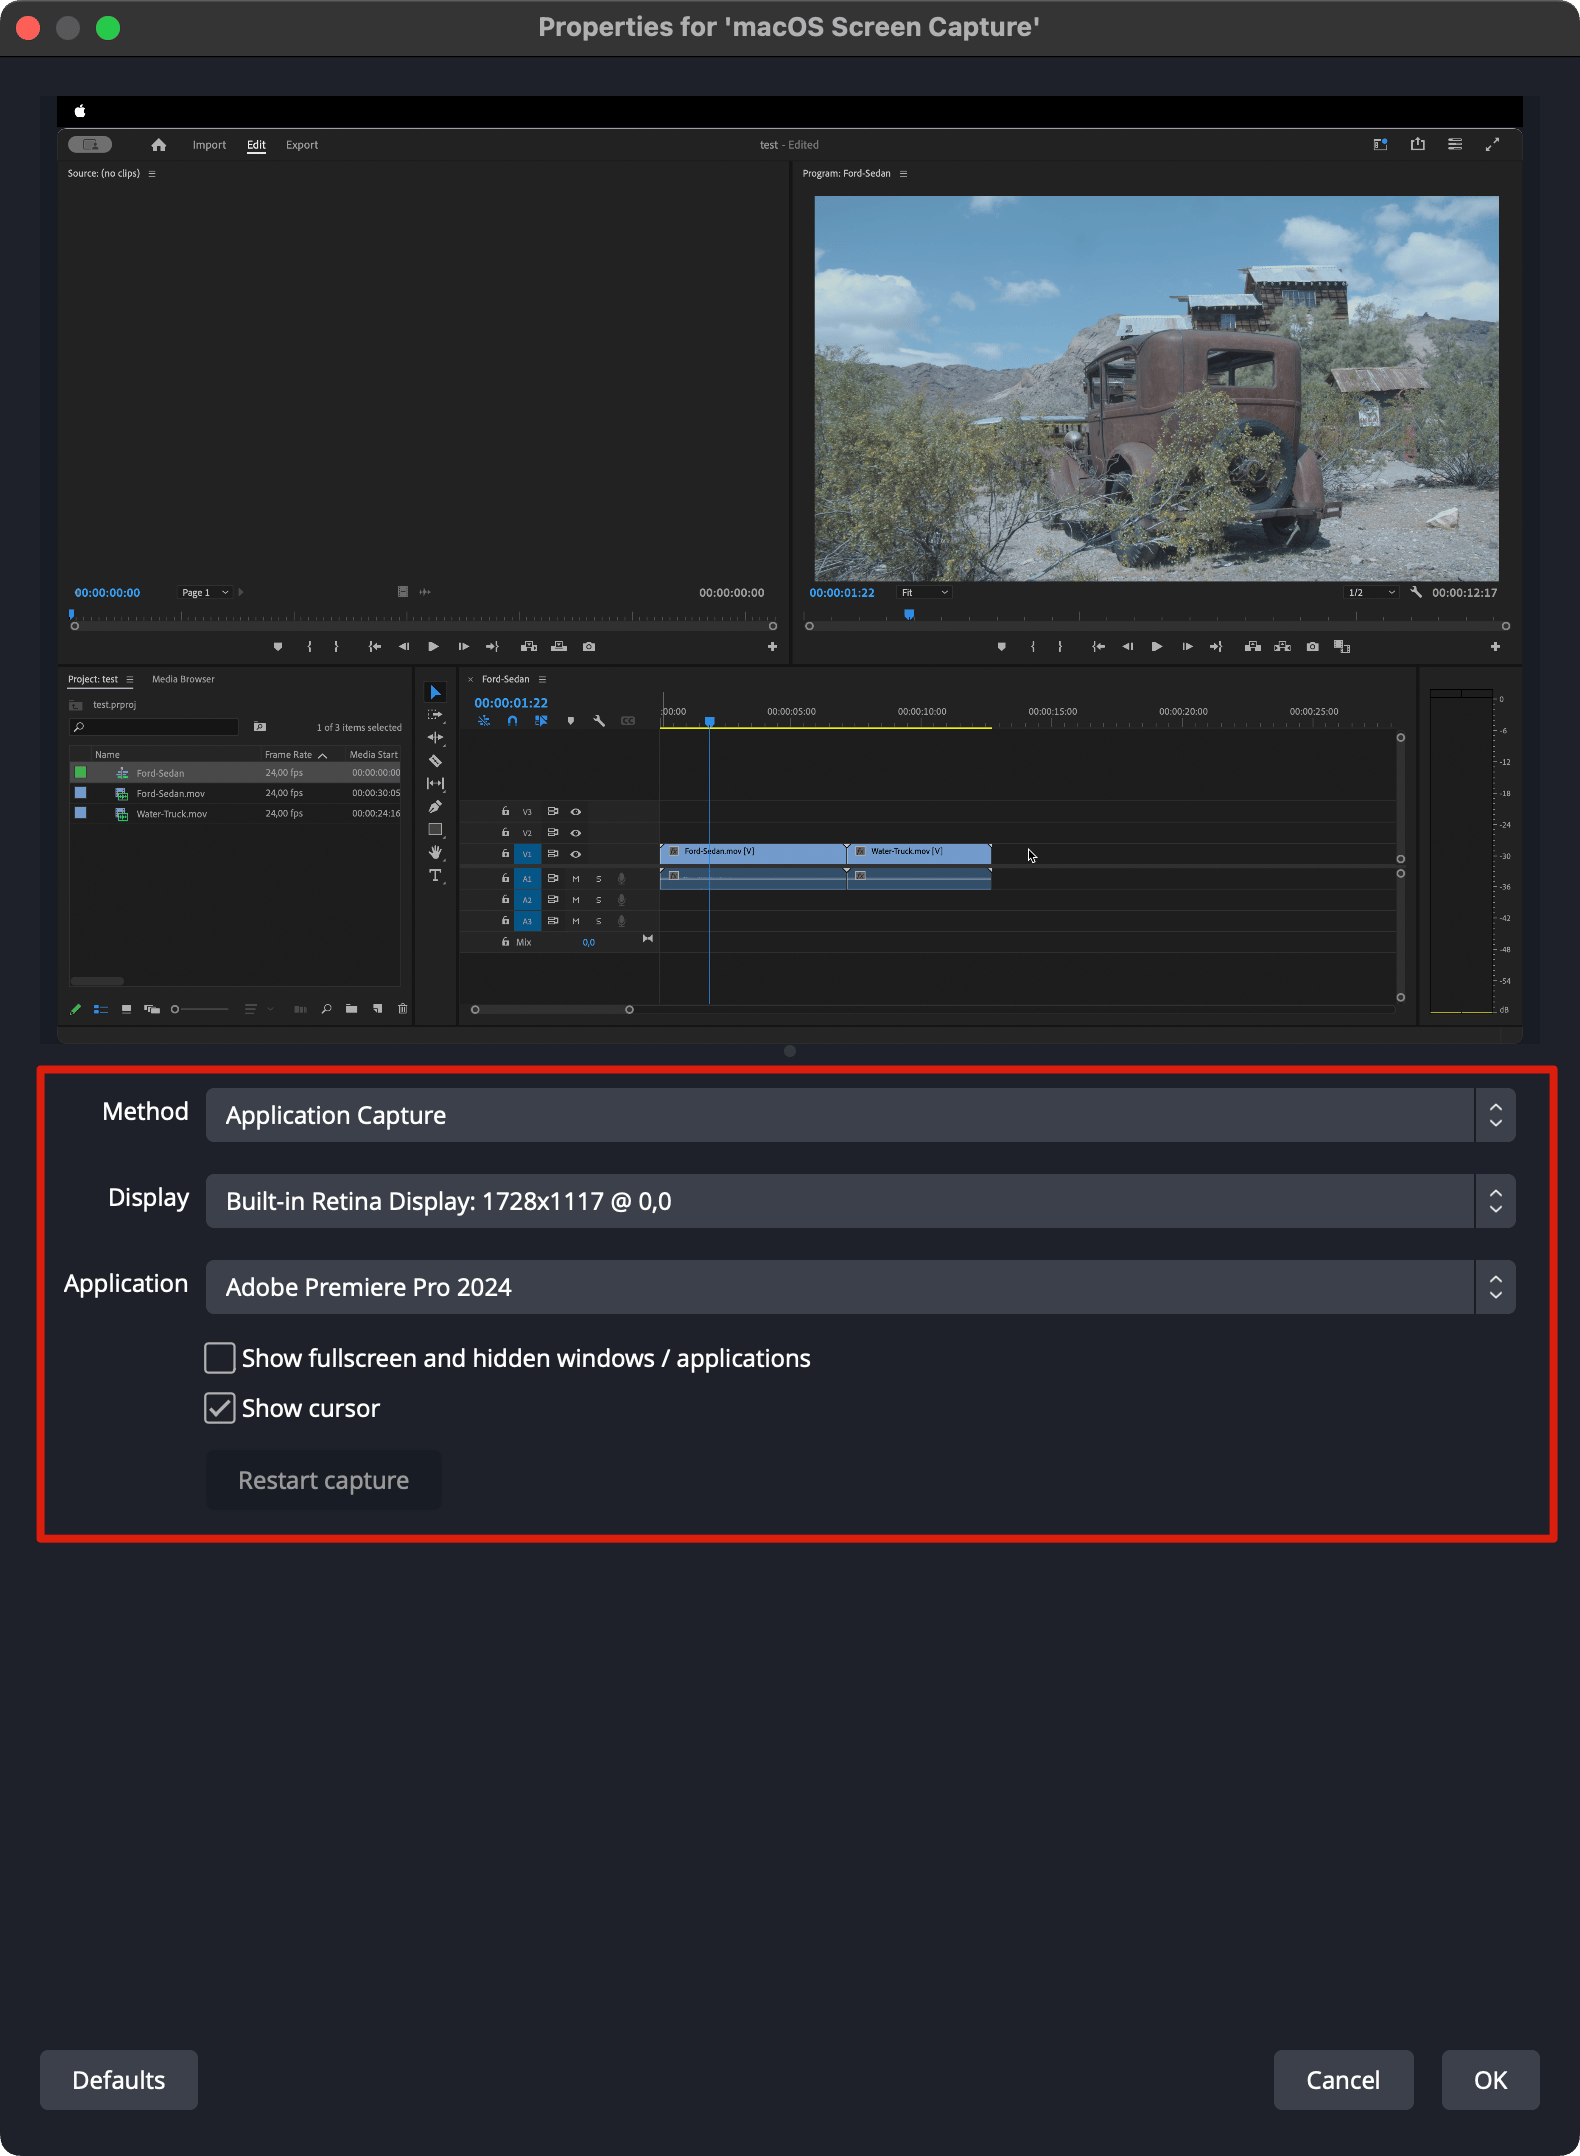
 In the window that opens, select the settings as shown.
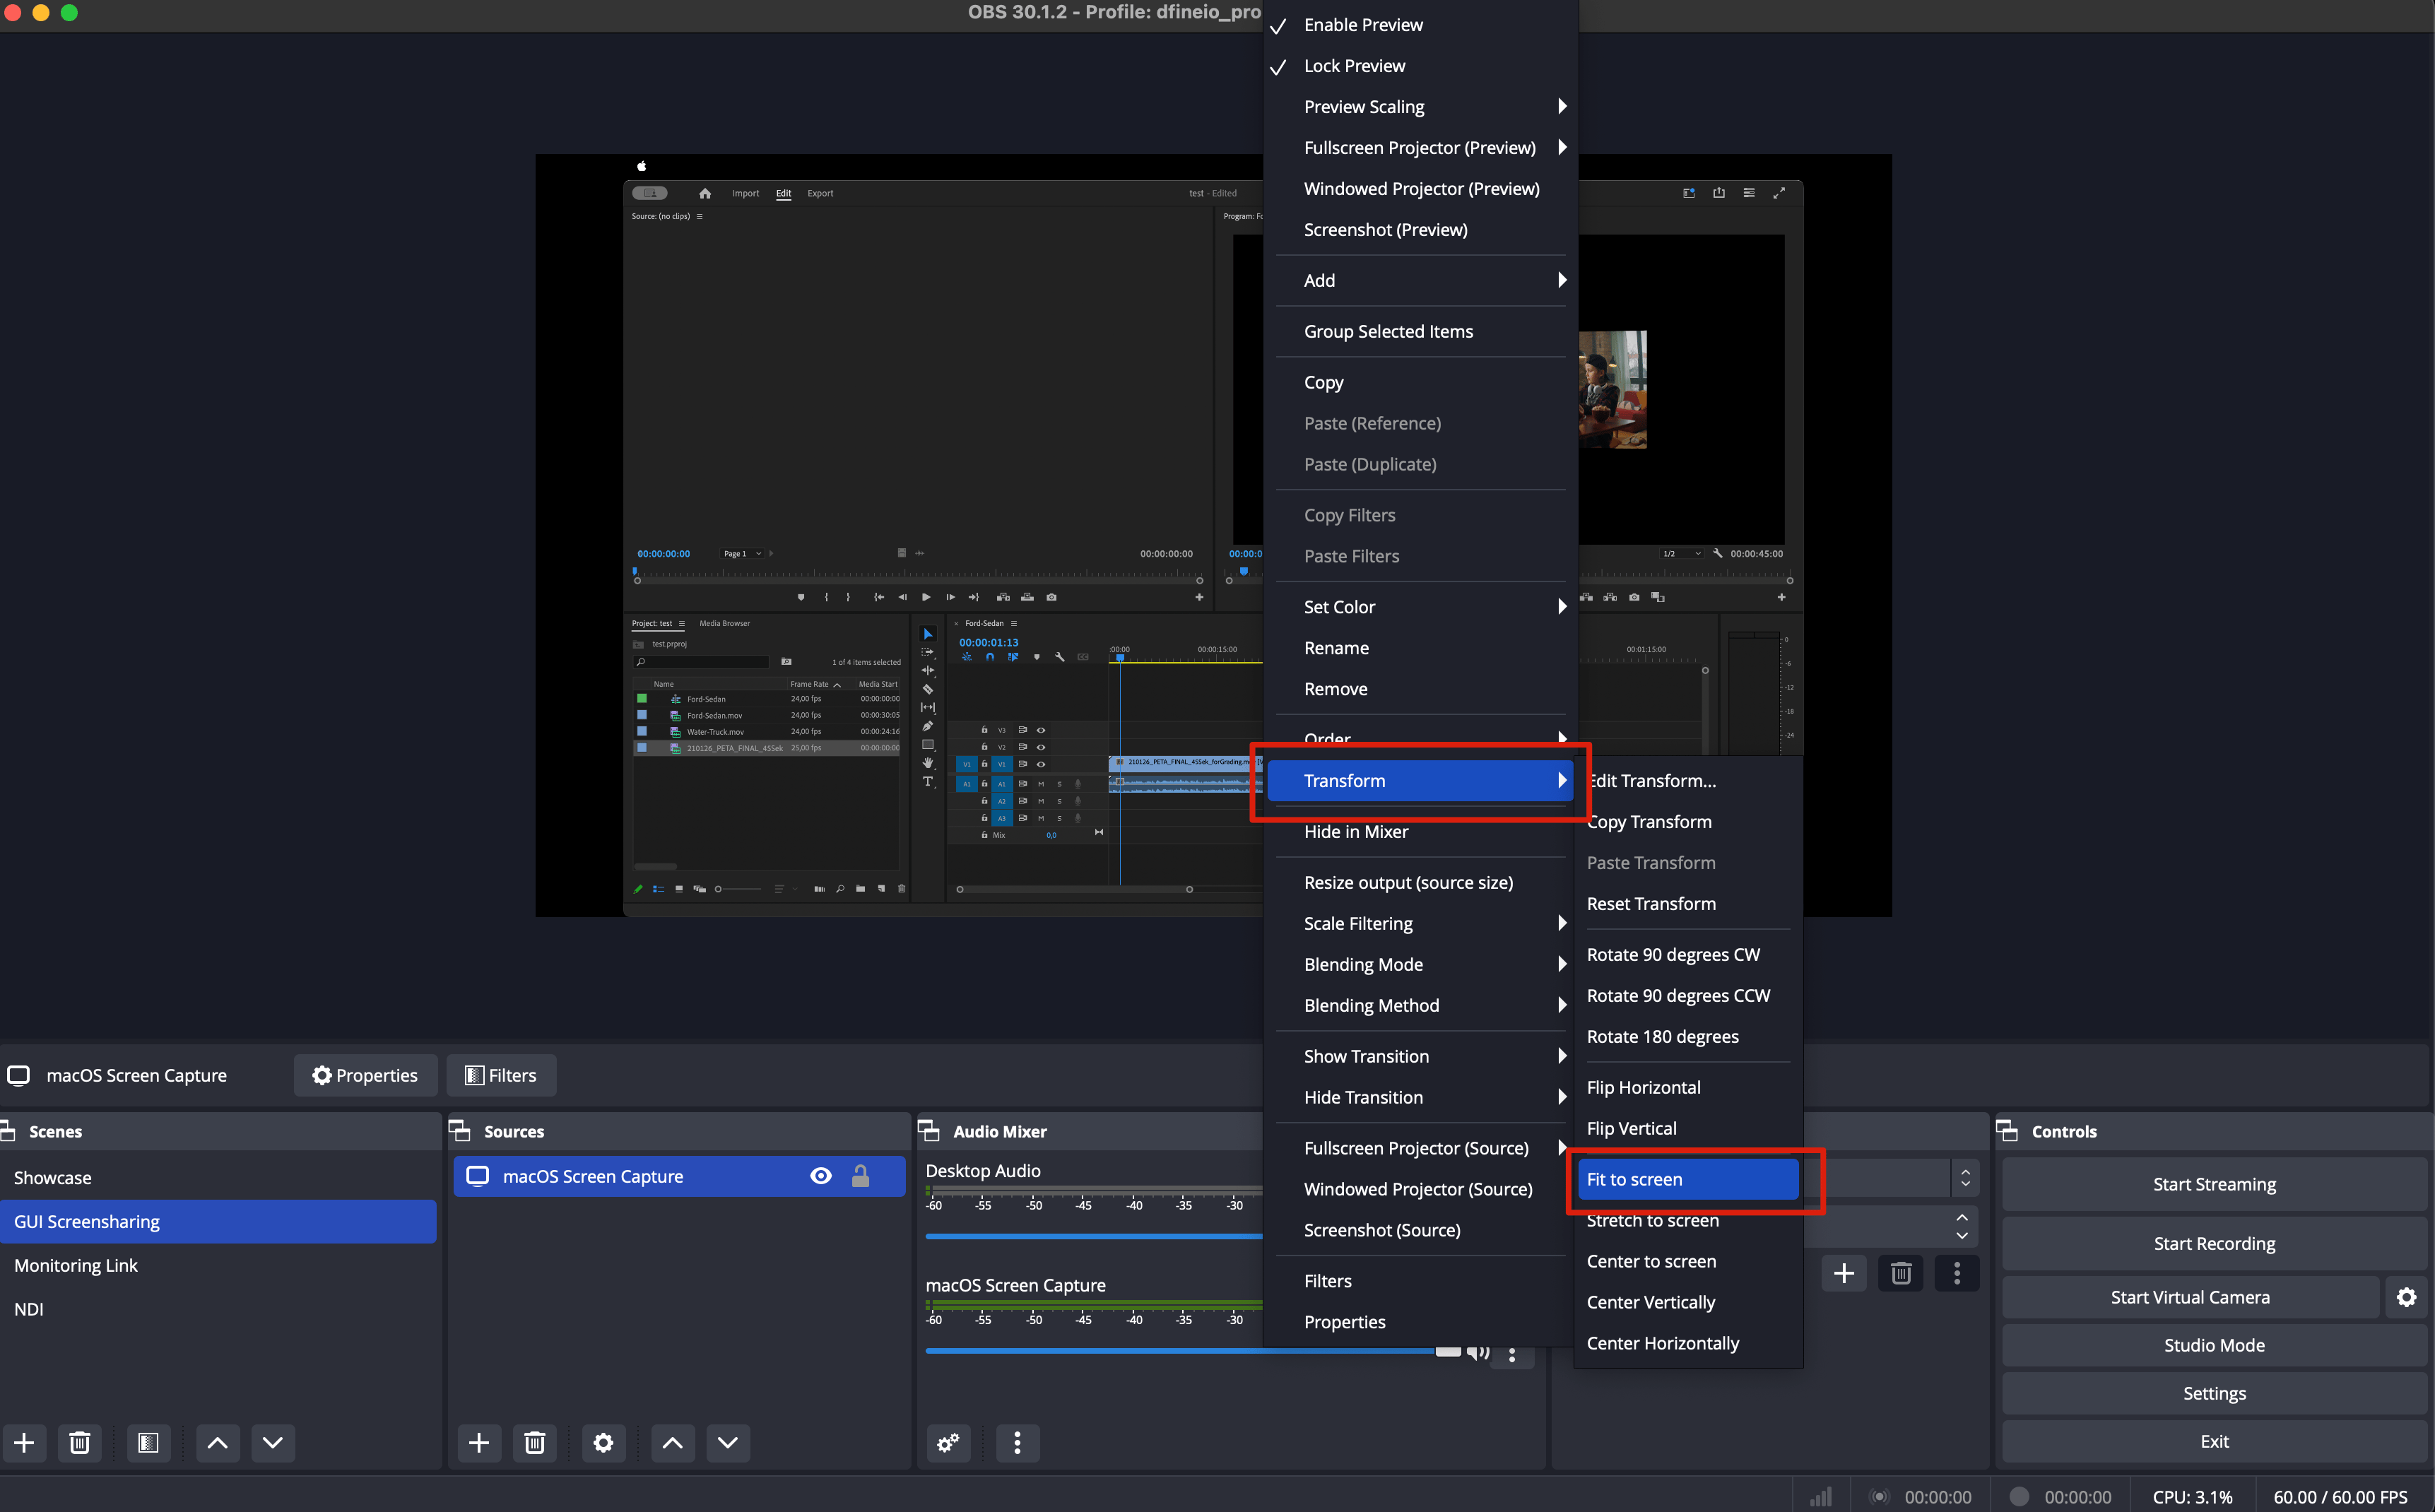
 Right click the preview, then choose **Transform**, then **Fit to Screen**.
 Turn off the default desktop audio, because no audio comes in on that channel. The audio is delivered through the **macOS Screen Capture** source instead.
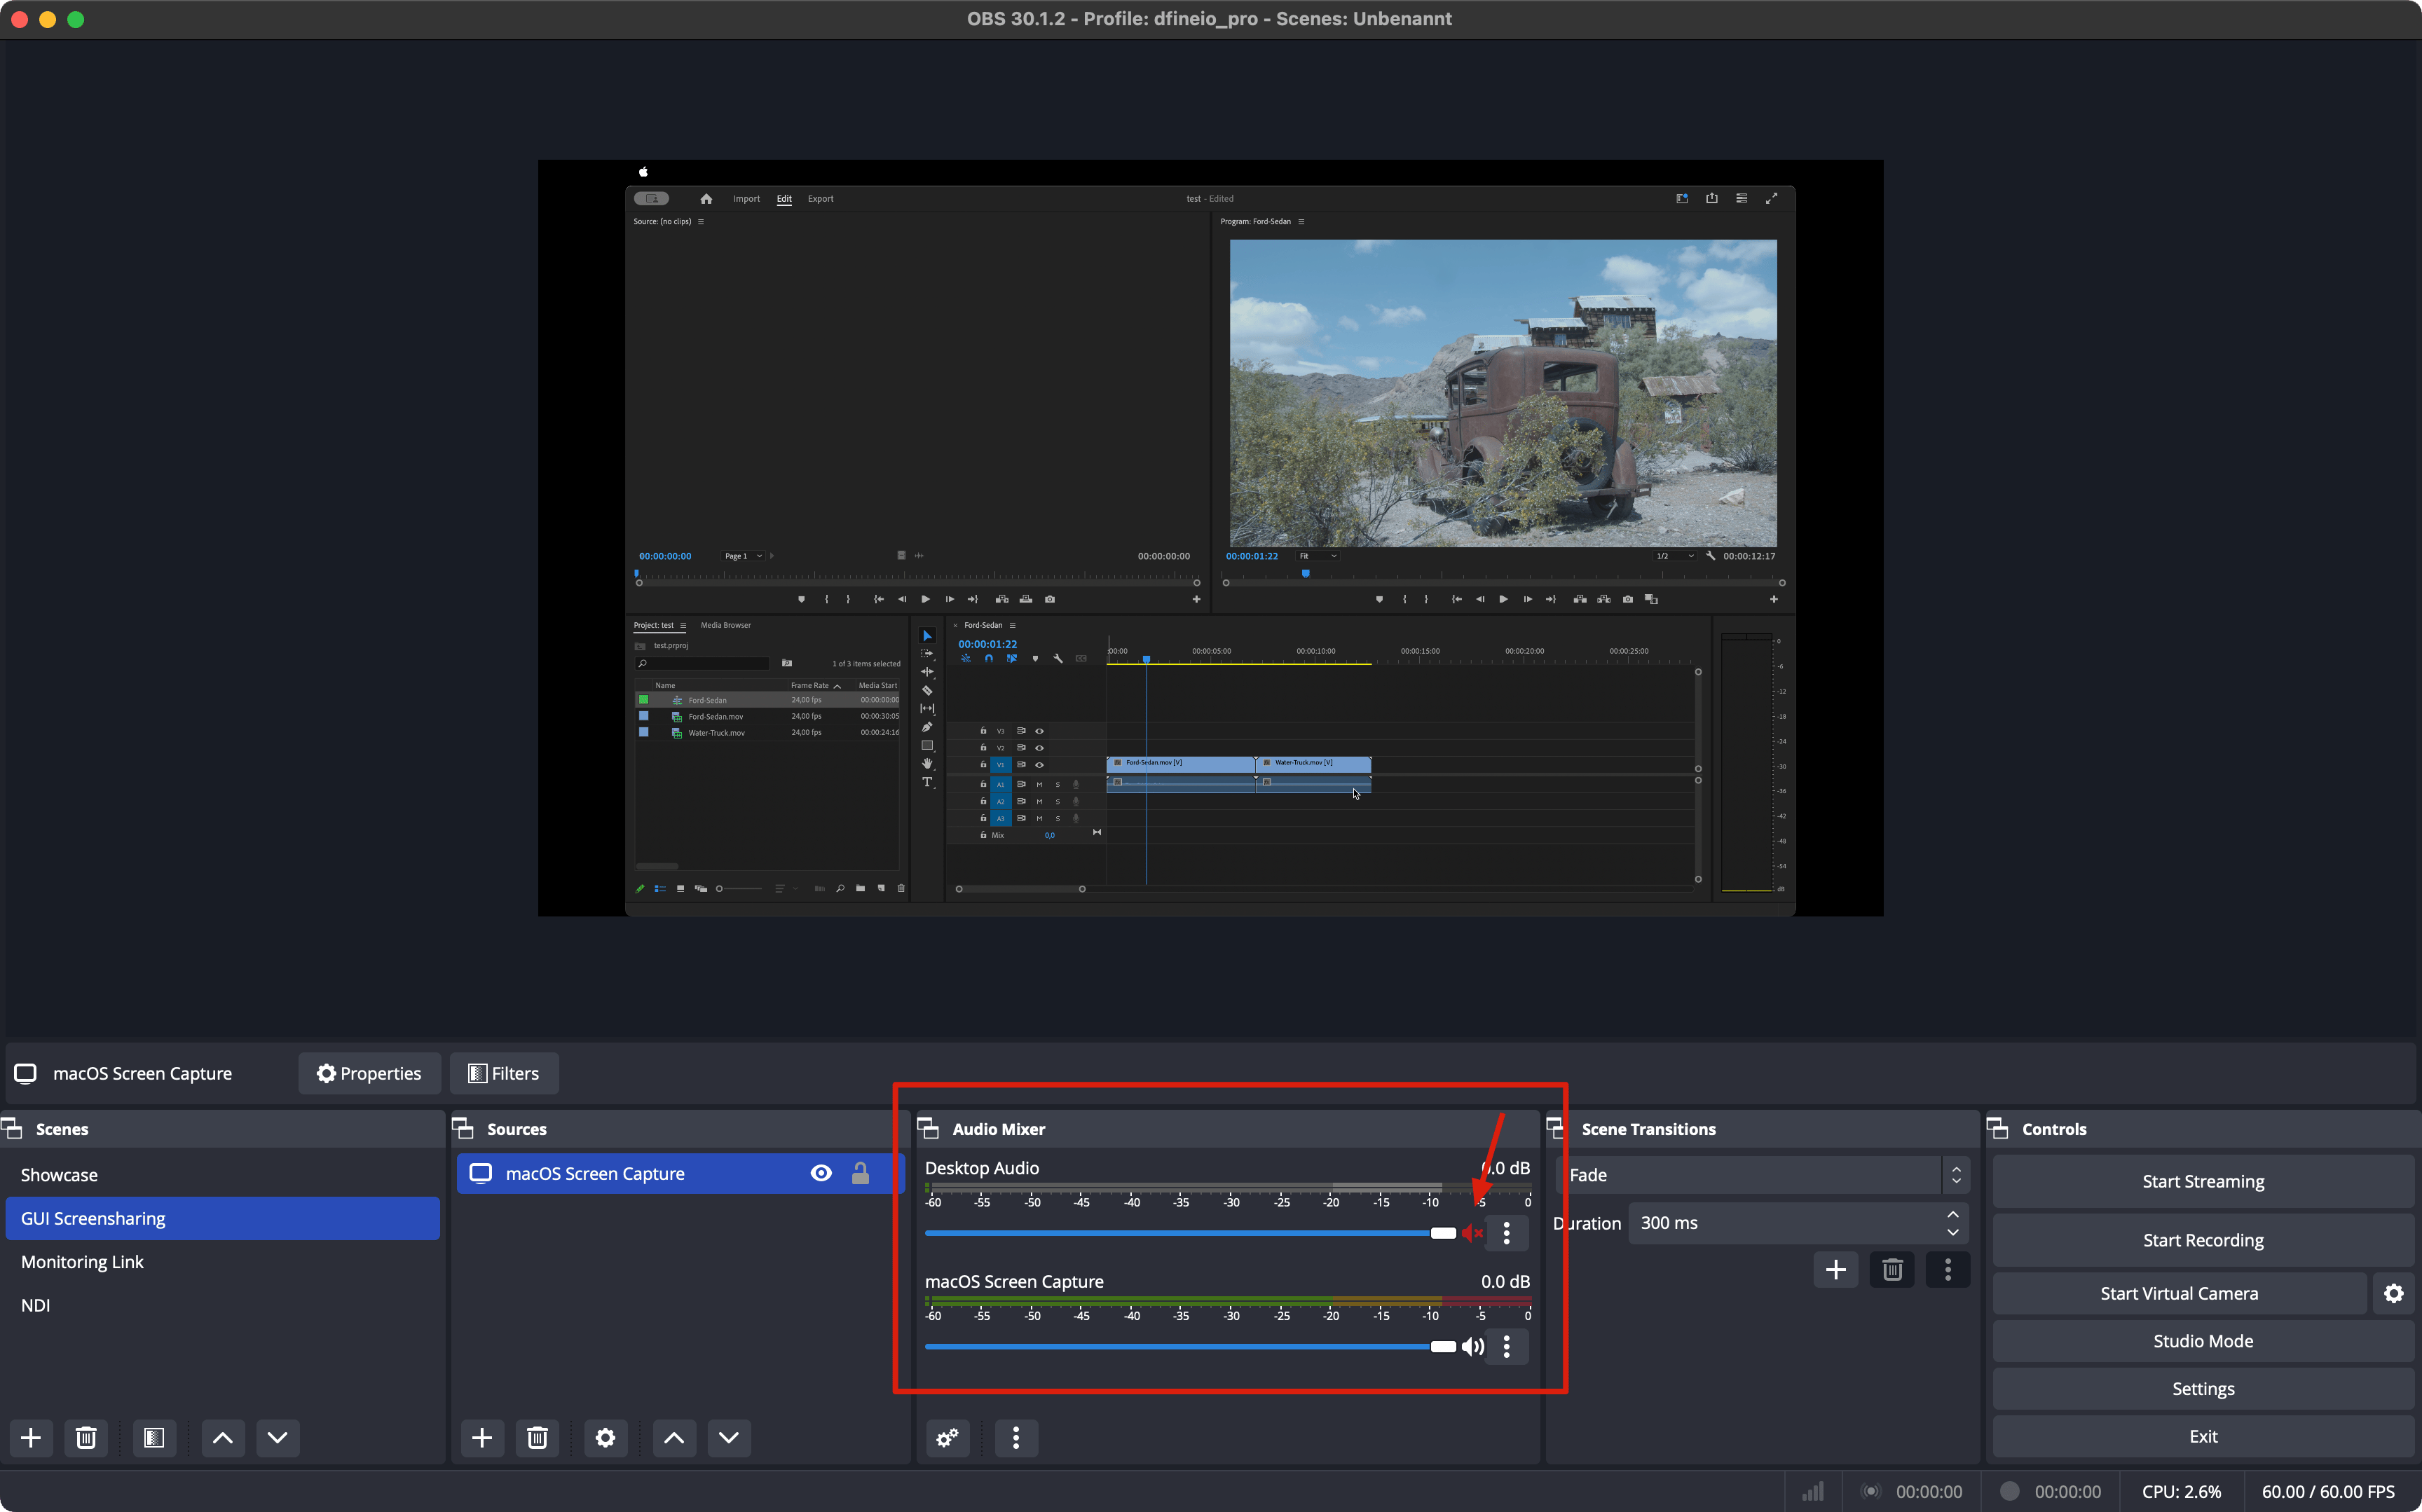 With the latest OBS version you no longer need the BlackHole audio drivers, which makes the setup much simpler.
Add your connection details in OBS and go live.
With the latest OBS version you no longer need the BlackHole audio drivers, which makes the setup much simpler.
Add your connection details in OBS and go live.